TimeWord word processor
User Manual
Word processor
Timeword V1.1
Copyright by TMX Portugal, Ltd.
Timeword v1.1
1- Introduction
Timeword v1.1 is a word processing program, presented in “cartridge” (solid state software) for use with your TC 2068.
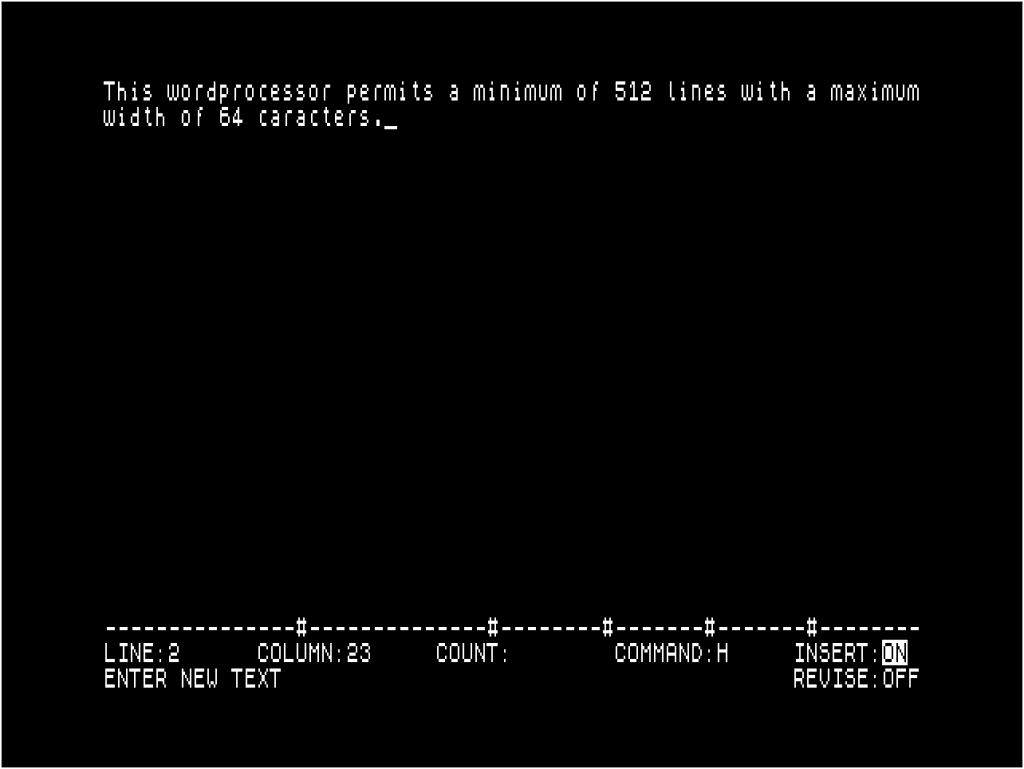
The application of the processor installed in the “cartridge” results in two essential advantages. One is instant loading of the processor. This means that as the processor is installed from the zero address, then when you turn on your system the processor immediately goes into operation. Therefore, it is not necessary, as in the other existing processors in the market TASWORD and WORDSTAR among others, to load into memory the processor of a disk drive. On the other hand, as the processor does not occupy RAM, since it is installed in the space assigned to the ROM, it allows the maximum use of memory (RAM) for word processing: 32K, which allows a minimum of 512 lines of text if the lines occupy 64 characters each.
Timeword v1.1 offers you the possibility to choose as text recording supports a simple cassette recorder or Timex’s Floppy Disk Drive (FDD) system. Edited texts can be listed with the TIMEX 2080 printer connected to an RS_232 channel. This RS232 channel will always be the FDD channel A (CH_A) or you will have to purchase the TIMEX “Interface” RS232 if you have made the recorder option.
Follow all instructions and precautions regarding the use of the cartridge with your TC 2068, as explained in the User Manual.
Throughout your Manual, the word STRING appears repeatedly, which must be interpreted, as a set of letters up to a maximum of 32 characters.
2 – Screen format
After inserting the cartridge and connecting your TC 2068, you will see that the word processor is structured in two different zones namely:
- Text editing zone
- Command zone and processor state
Below you will find a detailed explanation of how to operate your processor.
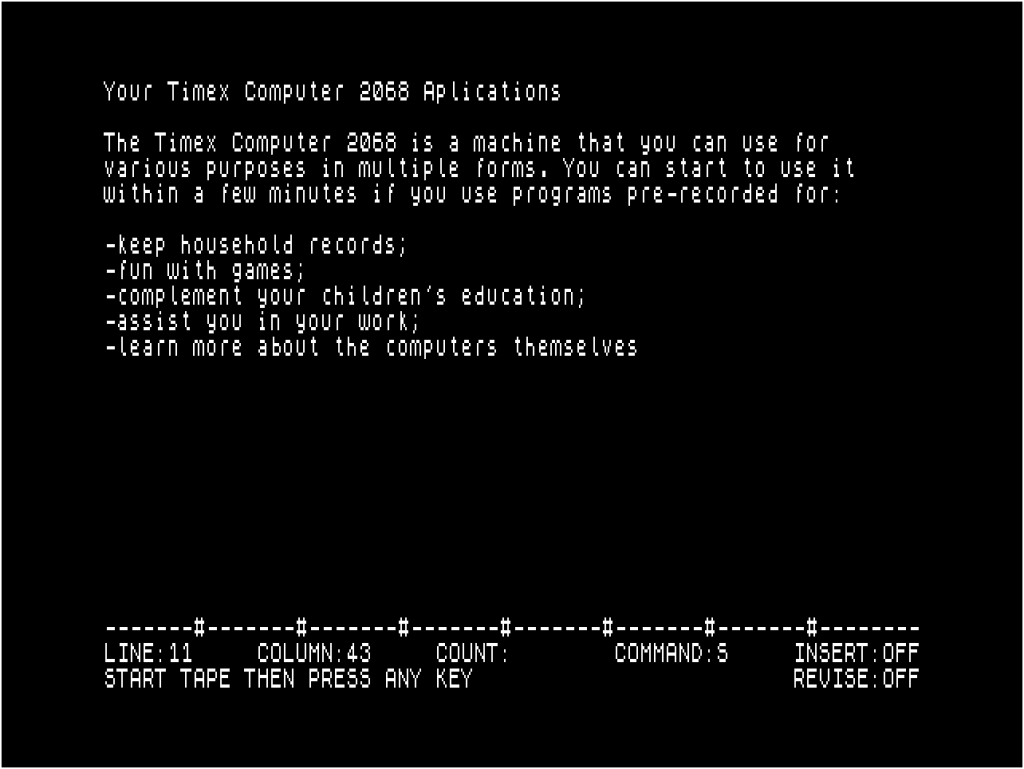
Timeword uses the 24 lines with the following distribution:
2.1 Text editing zone: between lines 1 and 21 inclusive.
2.2 TAB definition zone: corresponding to line 22 which has the following format:
——-#——-#——-#——-#——-#——-#——-#——-
where the # character represents the column related to the TABS table. This table can be set, with the processor out of edit mode, to any value lower than the maximum column (64).
Initially, the Tabs are placed in the multiple columns of 8 i.e., 8, 16, 24, …,56
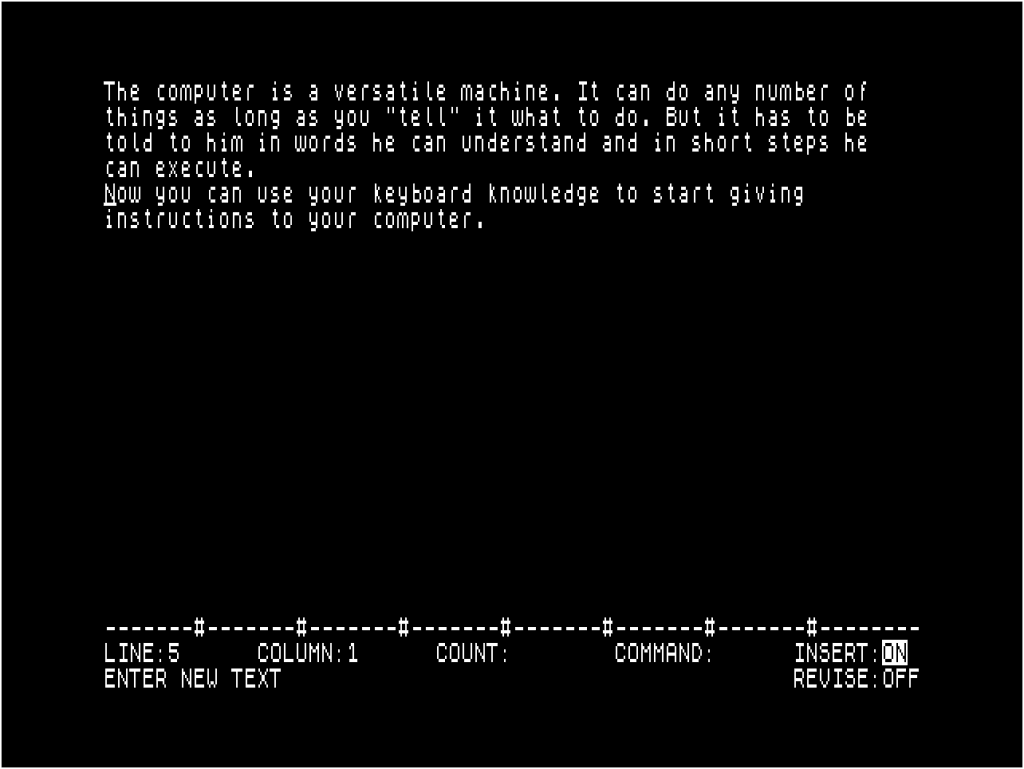
2.3 Command level zone and processor status: corresponds to lines 23 and 24, which have the following format:
LINE:xxxx COLUMN:xx COUNT:xxxx COMMAND:x INSERT:xxx
ENTER COUNT/COMMAND REVISE:xxx
where:
- LINE:xxxx – xxxx indicates the line number corresponding to the current cursor position, number between 1 and 9999
- COLUMN:xx – xx represents the column corresponding to the cursor position, number between 1 and 64
- COMMAND x – x represents the key related to the last command that was executed or running
- COUNT:xxxx – xxxx represents an optional parameter for some processor commands, indicating the number of repetitions of the command execution. If the COUNT is not specified, the default value is always 1.
- INSERT:xxx – xxx indicates the state of the word processor. If it is “ON”, the processor is in text input mode. If it is OFF, then the processor is waiting for a new command to enter.
- ENTER COUNT/COMMAND – this is a field dedicated to the interactive dialogue of the processor with the user. The ENTER COUNT/COMMAND comment states that the processor is waiting for a new command.
- REVISE:xxx – xxx indicates the state of the special mode text insertion, the REVISE mode. If the state is ON, the text is inserted overlay with the existing one. If the state is OFF the REVISE mode is disabled.
3 – How to use the Edit command
To start entering a text you must simultaneously use the CAPS SHIFT and 1 keys, which produce the appearance of the following message on the last screen line.

This message allows the processor to distinguish if the user wants to enter editing using the FLOPPY DISK DRIVE or cassette recorder as a storage unit, press the “D” key to use the FDD disk, or press the “T” key to use the tape recorder. Note that only these two keys allow you to advance in the text input process, or else by forcing STOP the command will be abandoned. After this, the processor will ask if it is a new file.
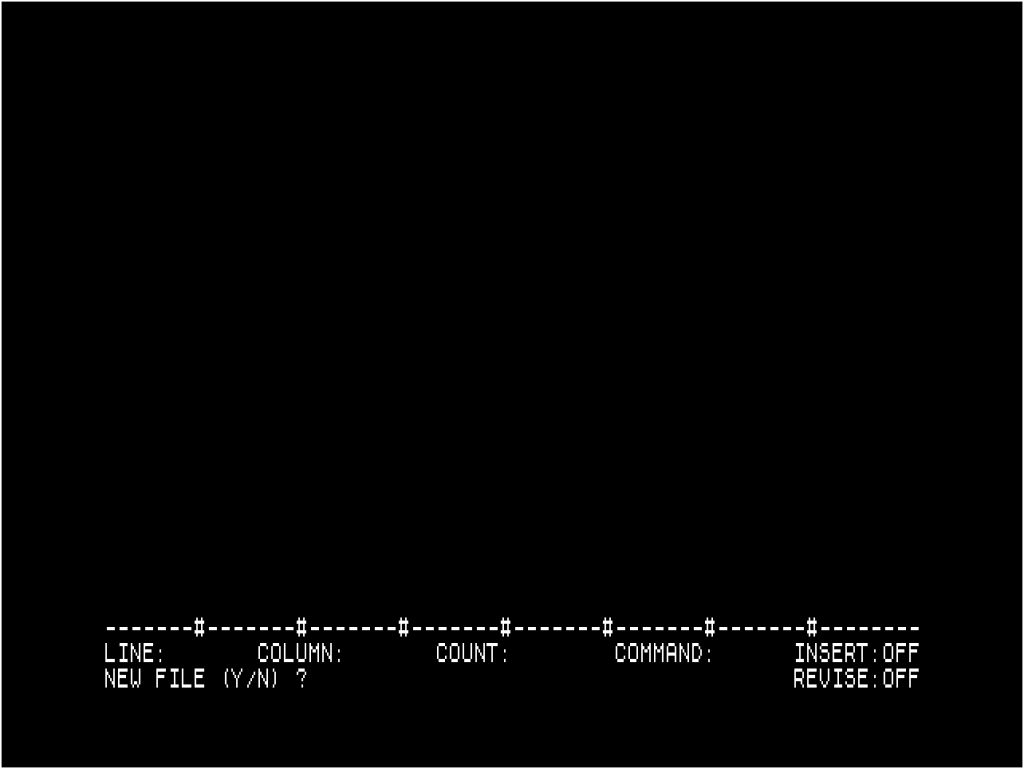
If you press the “N” key, the processor will try to load a file from your previous choice of recording unit.
If you press the “Y” key, the processor will create a new file if you choose the FDD to load/save texts.
Next, it will ask for a filename:
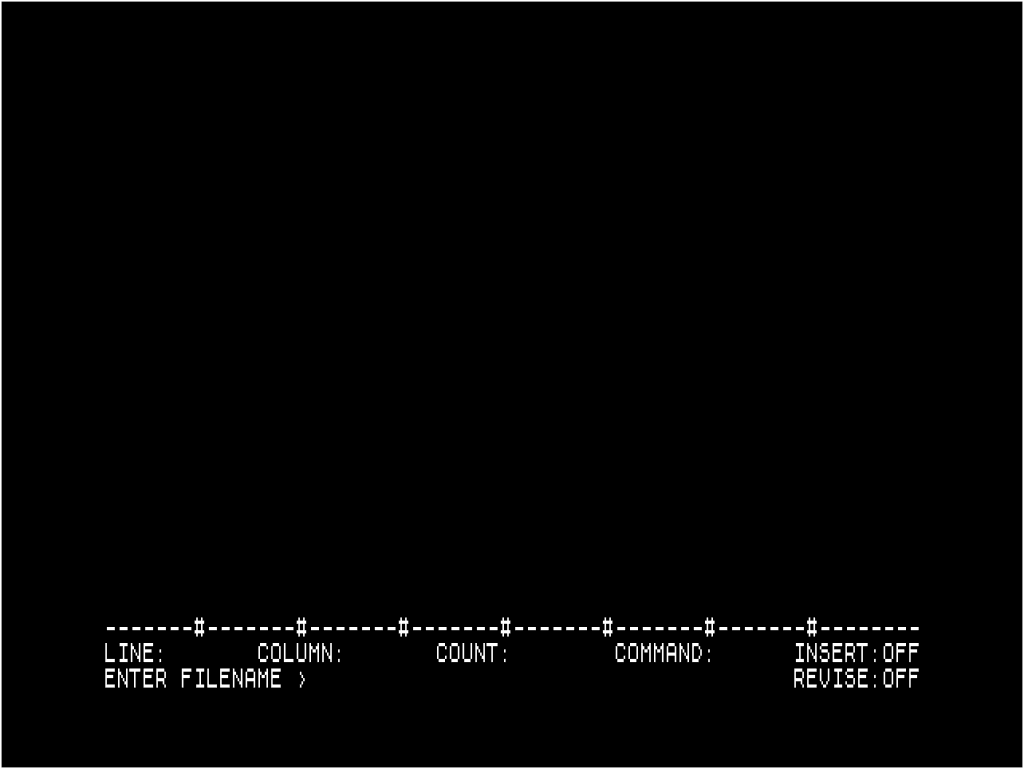
You should then type the name of the file you want to create/load followed by the ENTER key.
FDD only: After you press the ENTER key, the disc indicator light starts to flicker indicating that the system is trying to read the file from the disk.
If the program does not exist on the disks the lines 23 and 24 of the processor are as follows:
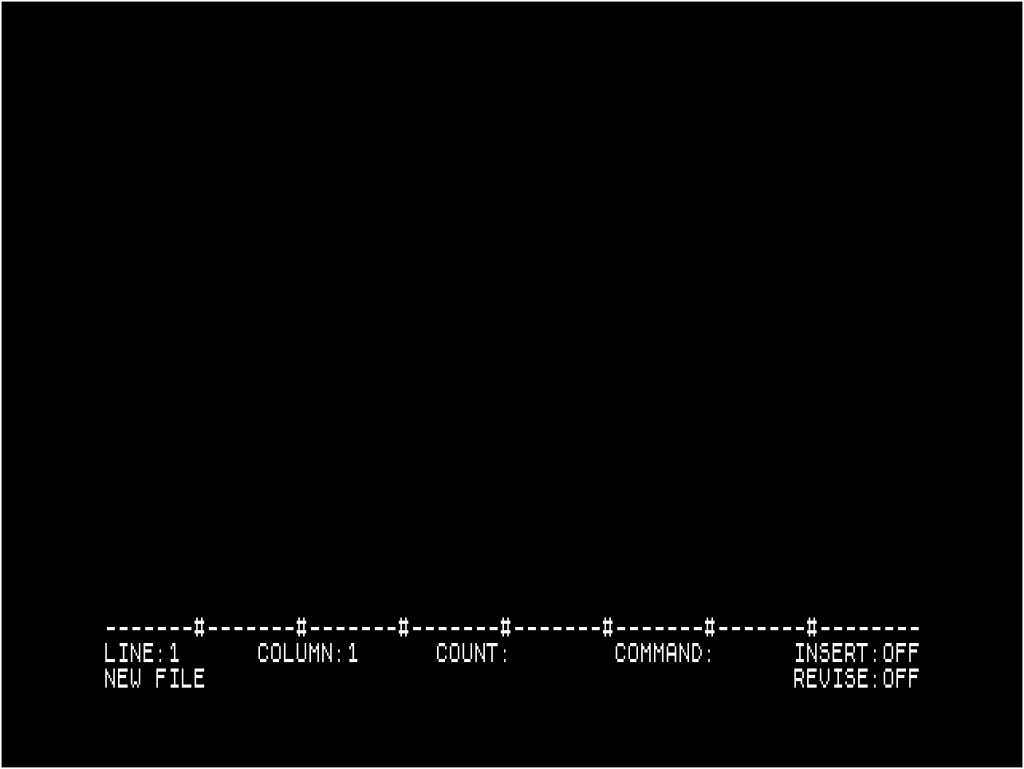
where NEW FILE, indicates that the program is new and consequently has no lines of text inserted.
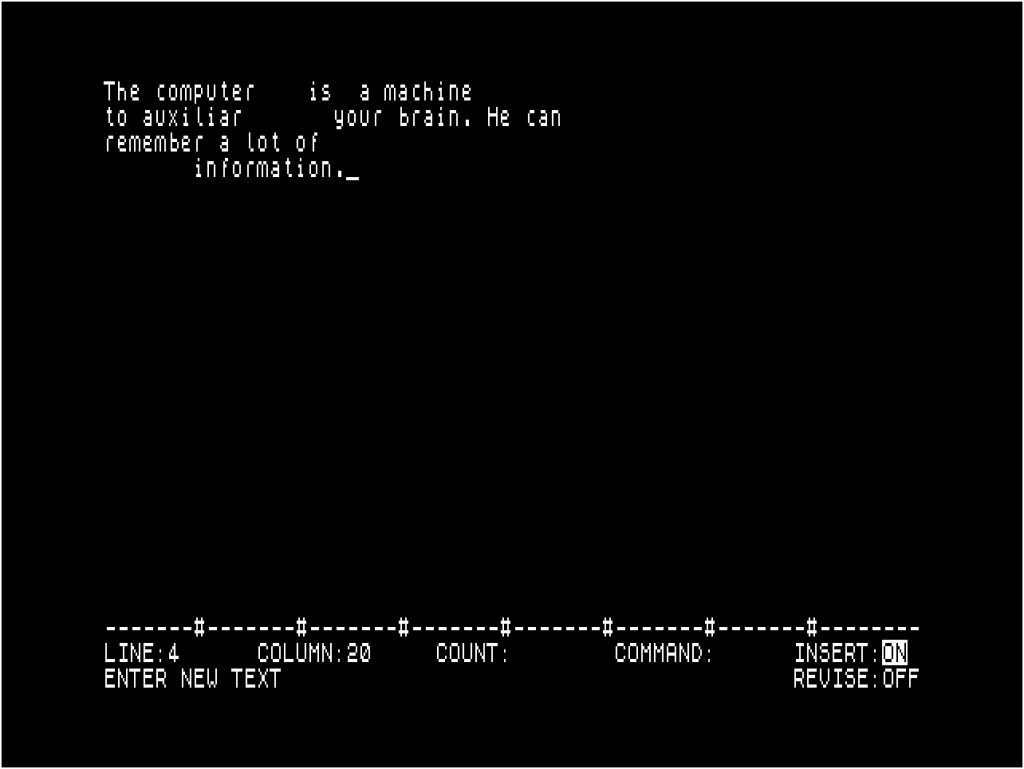
The processor from that point on is waiting for a command to advance in edit mode. To start writing the text you should press the CAPS SHIFT and 3 keys passing the lines 23 and 24 to be as follows:
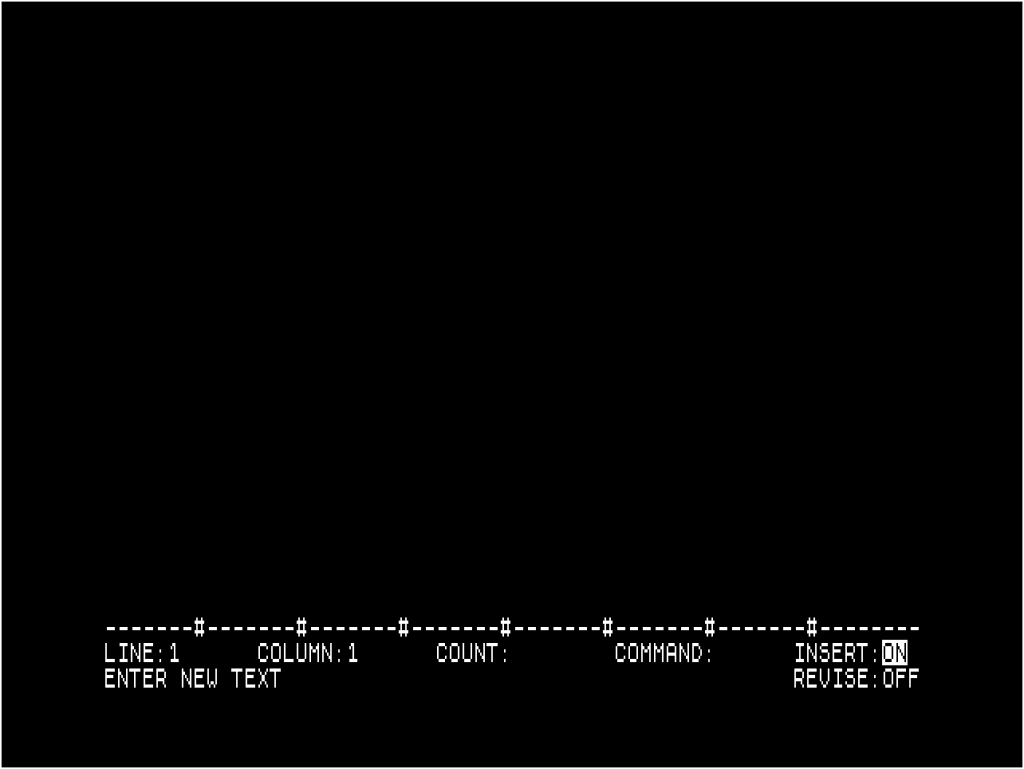
INSERT:ON indicates to the user that the processor is in text input mode, and this status is highlighted by the message on line 24 (ENTER NEW TEXT) which indicates that from this point on you can type the text you want.
This is the procedure for editing a new text. To reissue a file, the following steps are everything like those described in the previous mode, with the difference that when the processor accesses the disks to read the file indicated as it exists, the processor places the first page of the text on the screen. On the other hand, line 24 has different content because it is not a new file that will be edited. However, line 23 has strictly the same shape since the state of the processor is the same as in the previous case.
Lines 1 through 24 are as follows:
After entering the file name, following the ENTER key and the processor has searched the disks for the file, the cursor is always placed in the upper left corner of the screen corresponding to row 1 column 1, as indicated in row 23.
Next, let’s present a simple example of how to edit a text, save it to disk, and re-edit it again.
To edit the text the following steps are:
- Enter EDIT mode with CAPS SHIFT and 1 keys
- Select the read drive, D key (Disk)
- New file Yes/No
- Type the file name followed by ENTER
- Put the processor in INSERT:ON mode with CAPS SHIFT and 3 keys
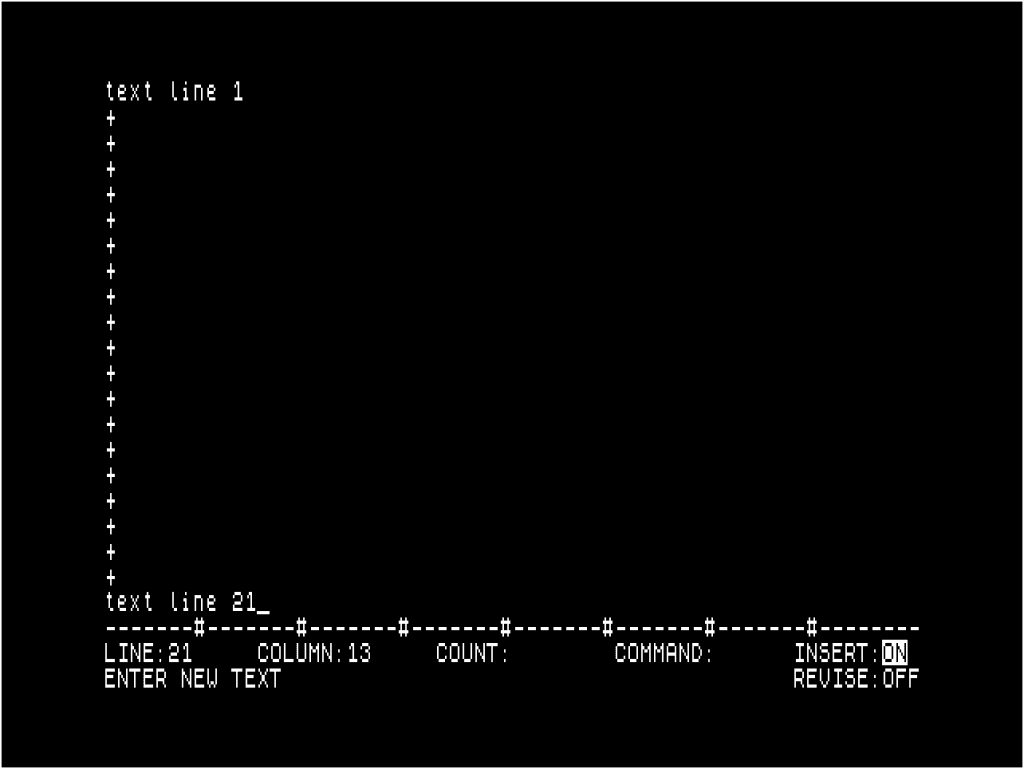
From this point on, you can enter the text. If the text entered was:
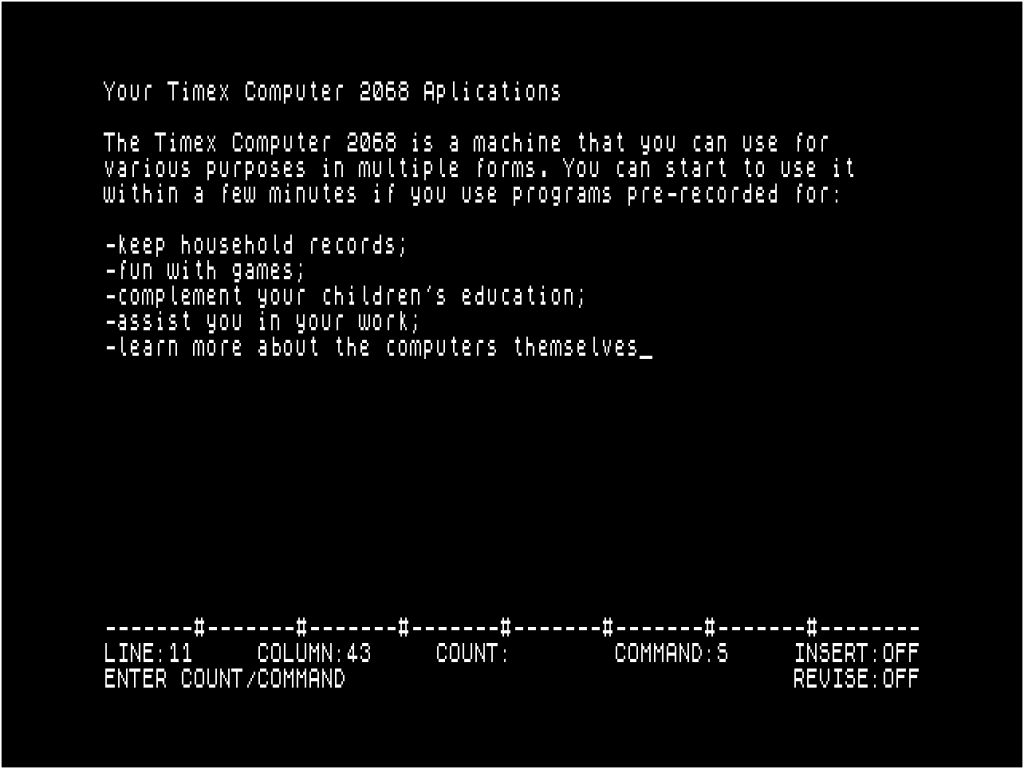
Once you have edited these 11 lines of text, we will save the file to disk. First, remove the processor from edit mode. This is achieved by forcing the STOP of your TC 2068 (SYMBOL SHIFT + A key). This procedure aims to put the processor at the command level. Next, you must run the EXIT command. So, just press the E key and the processor immediately asks if you want to burn the text to the disc (press D key) or to the cassette recorder (press T key). After selecting one of the two keys and, if the disc is chosen, you will see the light flashing with the meaning that the text is being written on the diskette inserted on the selected disk. The lines of text are erased from the screen and the processor passes to the initial state as if it had just turned on your system.
In short: to exit edit mode and save the text you must perform the following steps:
- Put the processor at the INSERT:OFF command level with STOP
- Press the E key (EXIT command)
- Select the recording drive (D disk/T cassette recorder)
To re-edit the text proceeds in the same way as the first time. The text edited and recorded on the diskette previously appears on the screen with the cursor in the upper left corner or sena in the column/row 1/1.
If for example, you wanted to add more lines of text from the last line, then use the keys that move the cursor in the row/column from which you will enter the new text. Then the processor is put back in the state of INSERT:ON and then the new text is written. If you want to change the content of a given line, then place the cursor on the line and then delete the text. In this case, you can see that the text is pushed or pulled when you insert or delete a character. This results in the processor not working with fixed lines, which makes it a better use of available memory capacity.
This process is repeated whenever you want to edit or save the text. There are also two new commands that allow the insertion of text: They are the INSERT LINE and REVISE.
However, in this part of your manual you only want to demonstrate how easily you can edit or save a text. These two commands will be explained in the next chapter, as well as all the other commands that allow the handling of text.
It should also be noted that if you have 2 or more disks connected to your controller, you can edit text on any of the disks. The only difference lies in the fact that when the file name is indicated, the disk name (A, B, C, or D) is first typed, colon “:” from the file name, such as:

where B: represents the drive where you want to edit the file.
Text editing using the recorder as the recording unit is processed in the same way. The only difference is in the 2nd step of the editing sequence in which the T key (tape) is selected. However, if you select the writer when entering edit mode, the processor asks if the file to be edited is a new file. This is because if the file does not already exist, the processor cannot read it from the writer. Summarizing to edit a text using the recorder should follow the following steps:
- Enter EDIT mode with CAPS SHIFT and 1 keys
- Select T (tape) for the recording unit
- Press Y for new file or N for an existing file in the cassette recorder
- Type the name of the file to edit and press ENTER
- Enter text input mode with CAPS SHIFT and 3 keys
The abandonment of this mode in everything similar to the discs, with the only difference that after having selected the recorder to record the text, the processor places the following message on line 24:
in order to warn the user that he must first put the recorder into operation and then press any key to start recording the text on the cassette.
When using the recorder to record or load texts you might find it weird that the usual stripes do not appear on your TV or monitor. You should not worry because the writing and reading process proceeds normally. This is because your TC 2068 is selected in 64-column resolution mode, which does not allow you to view the well-known stripes.
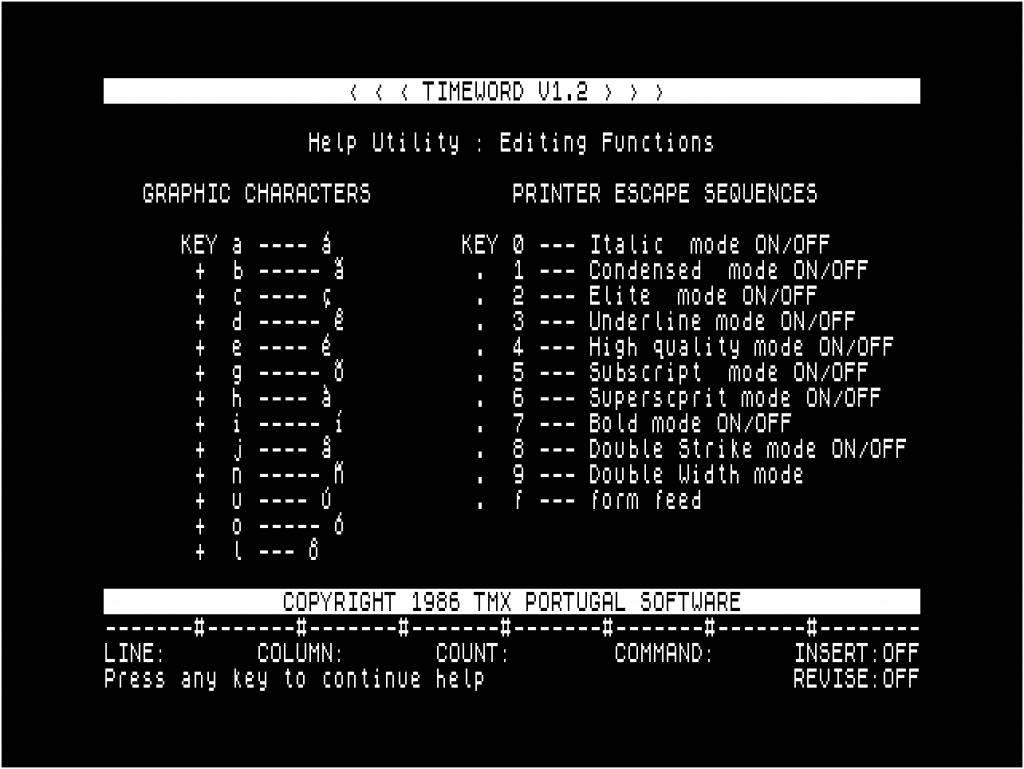
It remains to be seen only how the graphic characters are obtained. To write a character that needs accentuation, the processor is first placed in graphics character mode. To do this, the CAPS SHIFT and 9 keys are pressed. The key that is then pressed will be interpreted as a graphic, passing the processor to the previous state. This means that whenever you want to write a character with accentuation you have to press the keys related to the GRAFICS mode of your TC 2068. If you press these keys twice it is done in the same way the RESET of the mode. This is equivalent to saying that this mode is programmed ON/OFF using the CAPS SHIFT and 9 keys. To find out which characters are and in which letters they are defined, please refer to page 3 of HELP or paragraph 6.13 of this manual.
4 – How to use the PRINT command
As mentioned, it can send a text to a printer through an RS232 channel, whether inside editing a given file, at the level of commands, or outside editing and, consequently, also at the level of commands of the processor. It should be noted that when using the FLOPPY DISK DRIVE, the channel that is connected to the printer is always channel A, referred to in the TOS manual as: “CH_A”. If you do not have the disk system, then the processor will send the text through the Timex Interface RS232 developed by TMX PORTUGAL, which is connected to the expansion bus of your TC 2068.
After the processor is at the INSERT:OFF and REVIEW:OFF command level, the “PRINT” P key is pressed. Then on the last line of the processor, the following message appears:
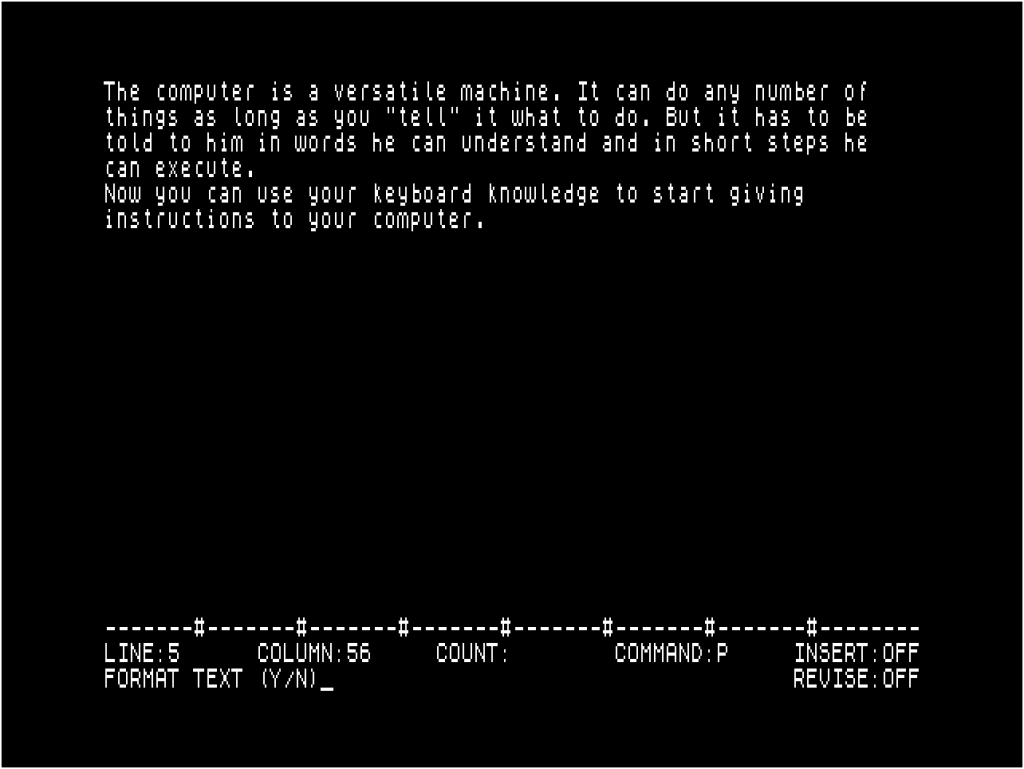
This first message aims to allow the listing of text with or without formatting.
If you need the N key, text is sent from the first line to the last line exactly as it appears on your monitor screen.
If the text is not in edit mode, then the processor asks for the file name. In this case, you should write it and the disc name if needed. From the moment the processor starts sending the text to your printer on line 24 is a new message: PRESS P TO STOP PRINT. From this point, the text begins to be listed on the printer, and you can stop the printing process by pressing the P key, as it is referred to in the message. It may happen that it is necessary to press the key for a longer time than normal to trigger the STOP mechanism. This is because, as long as the Operating System of the disks does not return the command to the processor during the transmission of a given number of characters to the RS232 channel, the keyboard reading is not performed since “interrupts” are not accepted the keyboard is not read.
After detection of the key that causes the listing to stop, (P key) a new message appears:
PRESS C TO CONTINUE OR A TO ABANDON PRINT
This message allows the user, after interrupting the process of listing a text in the printer, the option of being able to continue the listing from the bridge where he had left off (by pressing the C key), or else abandon the command (pressing the A key).
This procedure is identical when you select the formatted text parameter. However, before starting the listing of the text itself, the processor places a certain number of formatting parameters on the user, which are allowed to be defined, as explained below.
4.1 Parameters for text formatting
4.1.1 Starting line number
If you select the Y key in response to the message (FORMAT TEXT (Y/N)), a new message appears for the first parameter.
START AT LINE NUMBER >
This first parameter allows you to define the number of the line from which the text will start. The processor is thus waiting for the user to indicate the line number. The processor moves to the next parameter entry after one of the three possibilities has been accepted.
These options are:
- ENTER key listing from line 1
- Line number + ENTER key
- STOP cancels the command
4.1.2 Number of pages to be printed
The next parameter: STOP AT PAGE NUMBER indicates how many pages are listed. If you indicate this parameter as the value 1, then only one page of text will be printed from the line indicated earlier. As in the previous case, it can be obtained through the following options:
- ENTER key prints to the end of the text
- Number of pages indicated + ENTER key
- STOP cancels the command
4.1.3 Page numbering
The following parameter: NUMBER OF FIRST PAGE > allows you to number the pages from the indicated number
Options:
- ENTER key 1st page number starts at 1
- Indication of the number + ENTER key
- STOP cancels the command
This parameter is particularly useful when you have text divided into several files and if you want to paginate the text sequentially. So, if for example, we have a text divided into two TEST.POR and TEST.FRA has the first 20 pages and the second 13, then in the first the value of this parameter would be 1, while in the second it would be 21, with the pages numbered from 1 to 33 included.
4.1.4 Number of rows per page
The next parameter: NUMBER OF LINES PER PAGE > allows you to set the number of lines with which each page will be printed, as in the previous parameters has the following options:
- ENTER key number of rows per page will be 52 rows if this parameter was not previously set
- Indication of the number of rows per page + ENTER key
- STOP cancels the command
4.1.5 STOP between text pages
The next parameter: STOP AFTER PAGE is intended to allow the user to list text with A4 standard format sheets. For this to be possible, it is imperative that the processor stops the listing at the end of each page to place a new sheet on the printer. After the processor stops, it waits for it to press a key printing the new page, and so on.
After this parameter is accepted, the listing begins and is processed according to the definition of the parameters.
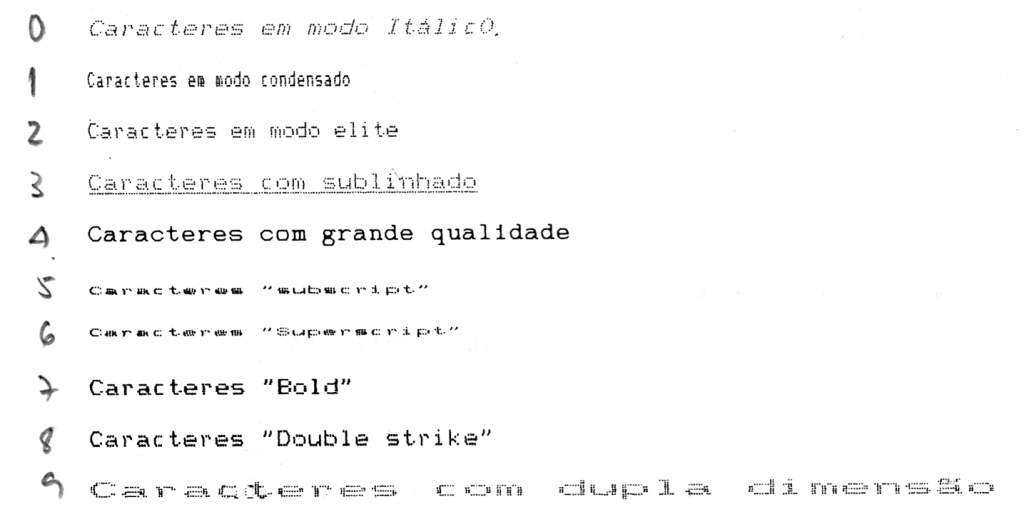
4.2 How to get different characters with your printer
Timeword has ten different ESCAPE sequences that you can use in your text. These sequences were defined with keys 0 to 9 running in ON/OFF mode. Thus, one can form combinations with any of the ESCAPE sequences. The result is an unbelievable range of different characters.
As editing advice, you should first write your text until you have it in final form. Then you can choose the font you want using the ESCAPE sequences in any combination, inserting it into the text. When you place a certain sequence in the text, a character appears on the screen that indicates the position of the inserted sequence, so that later you can quickly see what the status of the text is. These characters that represent the ESCAPE sequences are treated as normal characters. This way you can delete, insert, or move together with the text.
There is in addition to these strings a special character that is the FORM FEED defined in the key F. This character whenever inserted in the text is interpreted by your printer as the end of the page. This way your printer when you receive this character, starts printing the next text on a new page.
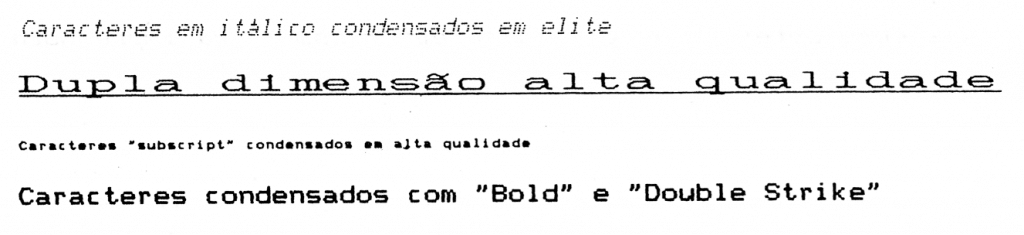
As an example, we will show some combinations using the ESCAPE sequences, however, we leave the user the freedom to explore this potential that Timeword allows him.
Individual sequences:
Sequence combinations:
5 – Edit function
In this chapter, we will describe all the editing functions that the processor allows by showing some simple examples.
5.1 Delete character: (CAPS SHIFT + 0 KEYS)
Erases the previous character relative to the cursor position. If the COUNT field is specified, erase the number of characters indicated in the COUNT from the cursor to the right.
Examples:
If it had the following line of text:
The word processor has been installed for your TC 2068
and, if the cursor were under the second l of the installed word, when you run DELETE the first l is deleted from the screen, and consequently eliminating the error of the text. If the key combination is pressed again, a new DELETE will happen, it would be the previous letter (letter a) that would be deleted and so on.
Forward DELETE is only allowed with the processor out of INSERT mode (INSERT:OFF). Thus, when the processor is in the indicated mode and, if the cursor is flashing under the first l, press the key I. You can see that in the field COUNT appears the digit 1 after the colon. Then executes the DELETE function thus obtaining the same result. However, the DELETE forward has particular interest when you want to erase several characters in a line, or even pull the previous line up which is equivalent to erasing the RETURN that is at the end of each line.
5.2 Delete line: (K Key)
Erases the line corresponding to the current position of the cursor. If the specified COUNT field erases down the number of rows indicated in the COUNT from the position where the cursor is. This function is only allowed outside of INSERT mode.
Example:
Assuming the text I had just edited was as follows:
If you want to delete line 5, then first place the cursor on line 5 and then press the K key (kill).
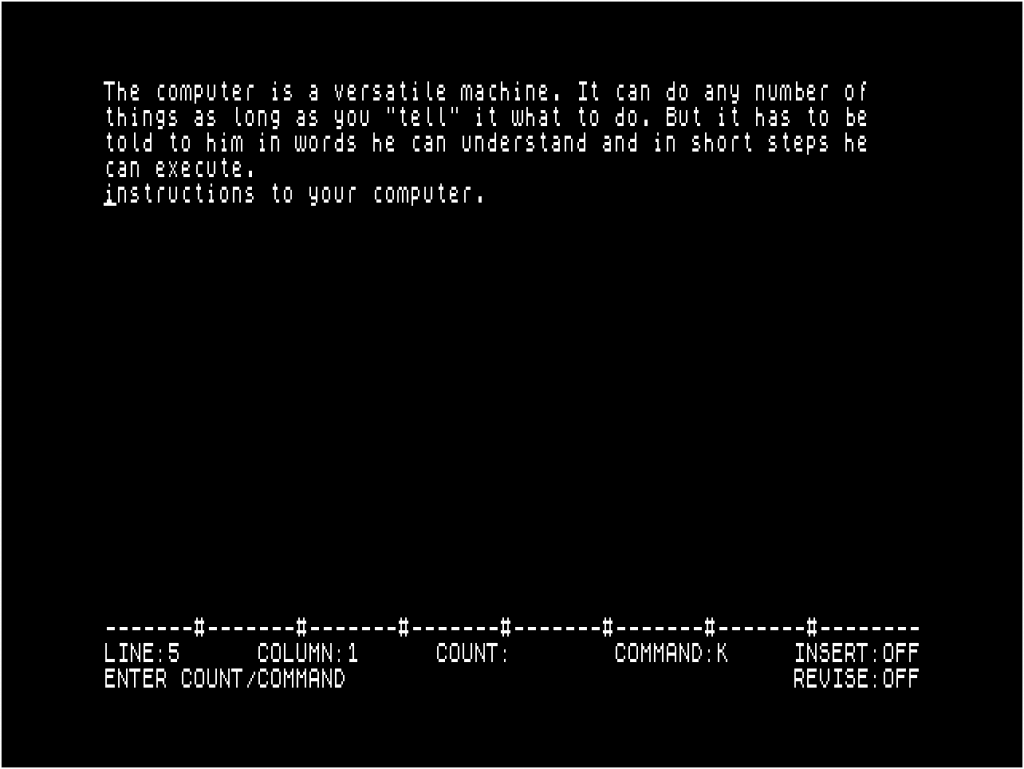
As you can see line 5 has been deleted from the screen and consequently from the text in RAM. If on the other hand, you want to erase more than one line, and in this case were lines 5 and 6, then after having the cursor positioned you must first indicate the COUNT with 2 lines and then press the K key. The maximum number of rows that are allowed to delete is the maximum amount allowed for the COUNT 9999 field.
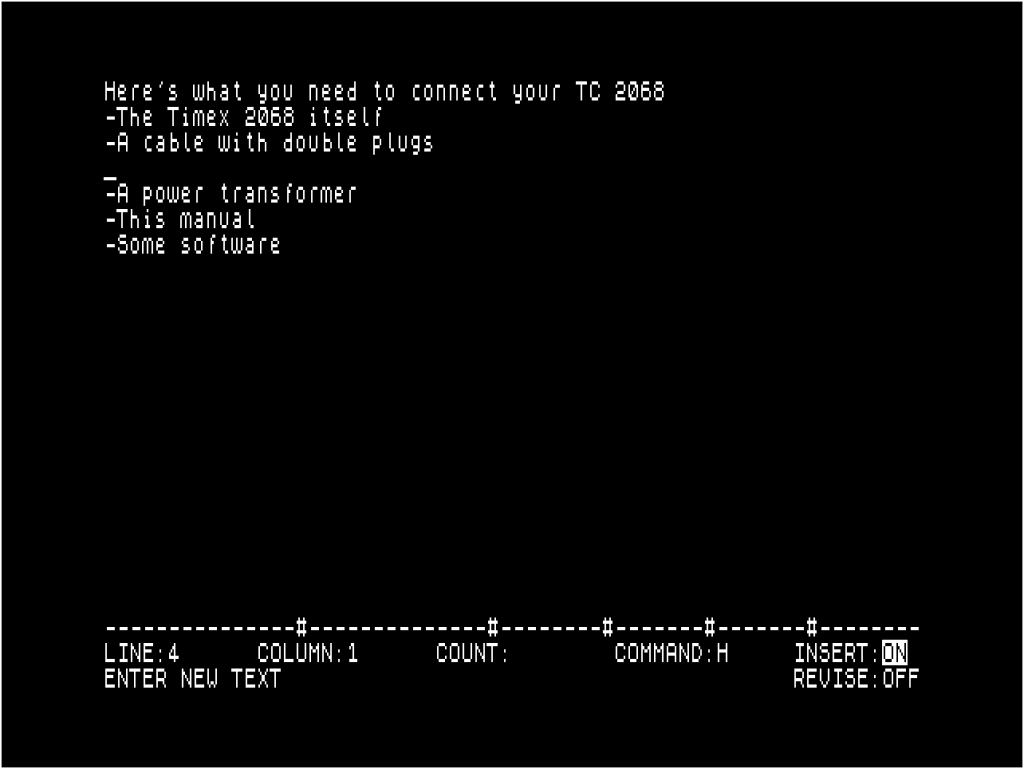
5.3 Insert line: (CAPS SHIFT + 4 KEYS)
Inserts an empty line after the cursor position. Passes the processor to text input mode.
Example: Having the following text:
If you want to insert a new line after line 3 you must place the cursor in the previous line and then run the INSERT LINE function with the CAPS SHIFT and 4 keys. The text would have one more empty line and if you check at the end of line 23 the state of the processor indicated is to be in INSERT:ON mode.
5.4 Insert ON: (CAPS SHIFT + 3 KEYS)
Place the processor in text insertion mode from the current position of the insertion cursor. This command was analyzed in chapter 2, so we will not re-detail its description.
5.5 Insert OFF: (SYMBOL SHIFT + A KEYS)
Exits text insertion mode. The processor is in command mode.
5.6 Cursor TAB: (SYMBOL SHIFT + Q KEYS)
Executes a TAB defined by the TABS table with its representation in row 22 of the display. When it is in insertion mode when performing a TAB, the cursor is placed in the next column corresponding to that of the next # symbol. These characters indicate the position of the defined TABS in a table that is initialized and that can be changed as referred to in paragraph 6.5
5.7 Cursor home: (SYMBOL SHIFT + E KEYS)
Place the cursor in the position corresponding to row 1, column 1 of the text on the screen.
5.8 Arrows: (CAPS SHIFT + 5,6,7,8 KEYS)
Moves the cursor in the direction indicated by the arrows from the beginning of the text to the end of the text.
6 – Word processor commands
In this chapter, we will show you all the allowed commands and some examples. Note that all commands are only allowed with the processor in INSERT:OFF mode
6.1 Print (P KEY)
Sends a complete or partial file to an RS232 channel. If the file is in memory, therefore in editing, it will be that text that will be transmitted to the channel RS232. Otherwise, a file from any disk can be listed by specifying the name of the disc and the text, as exemplified in chapter 3.
6.2 Advance (A KEY)
Shifts the cursor to the number of rows up or down according to the value indicated by the COUNT field. With this command, we can go directly to the end or beginning of the text and up or down a certain number of lines. This is achieved by indicating parameters in the COUNT field. These are:
- Minus sign “-” go up lines
- Signal forward forward “/”slash:
- Indication of the number of lines to go up or down
- Ex1: COUNT:/ COMMAND:Advances to end of text
- Ex2: COUNT:-/ COMMAND:A Rises to the beginning text
- Ex3: COUNT:-12 COMMAND:A Rises 12 lines
- Ex4: COUNT:12 COMMAND:A Advances 12 lines
6.3 Find (F KEY)
Places the cursor at the beginning of the user-defined STRING
Example, type this text:
With the processor at the command level, pressing the F key brings up the following message on line 24 of the screen:
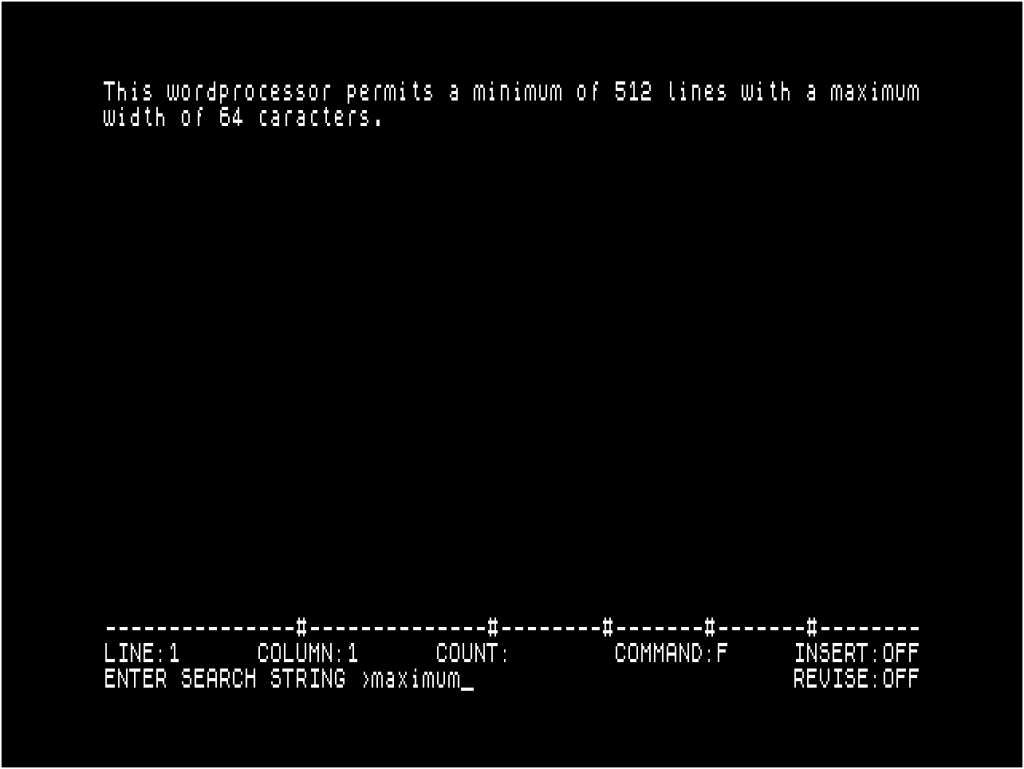
and you want to search for the maximum word, first press the F key (Find), then type the maximum word and, to finish, press the ENTER key. After this procedure, you can see that the cursor is flashing under the first letter of the STRING that was searched in this case the letter m.
In another case when the text is larger and not visible, in the screen the STRING that you want to search. After you run the FIND command to make sure that it was not this part of the text that you intended to search for, but the next one, to rerun the FIND command, it is not necessary to retype the STRING since the processor always remembers the last one that was set. This, of course, if you want to look for the same STRING.
Summarizing to look for the same STRING just press the F key and follow the ENTER key.
On the other hand, if the COUNT field is actuated then the command will be executed the number of times indicated. This means that if you had the last 3 lines of the screen as follows:
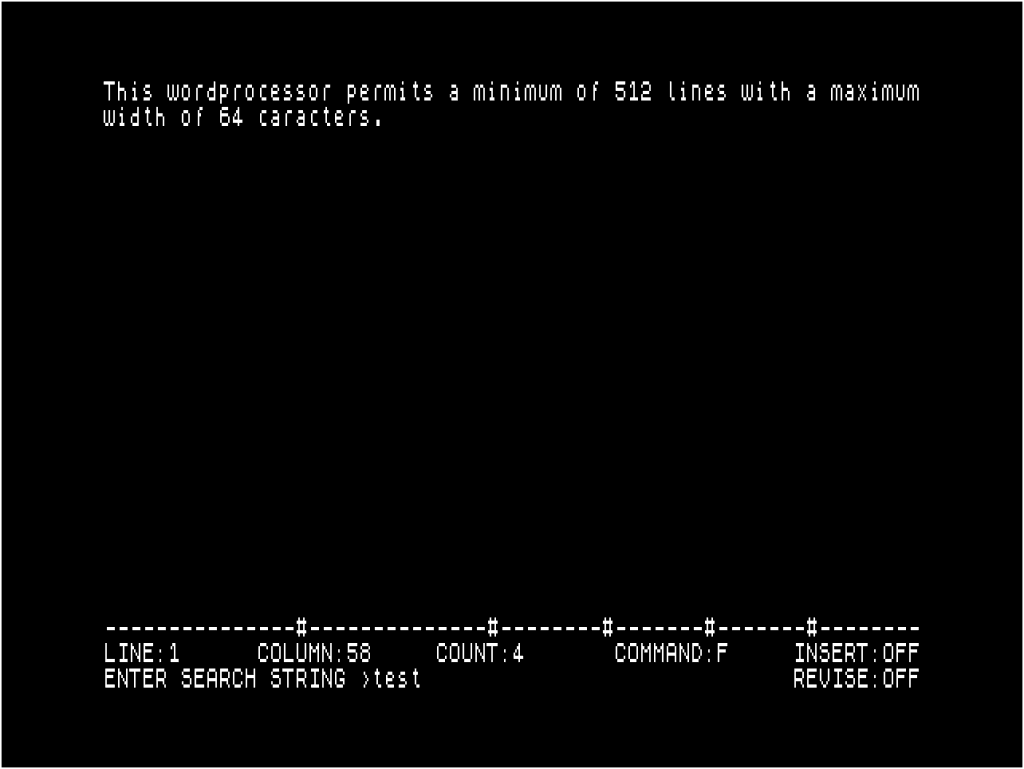
i.e., to look for the STRING “test”. However, the first and second STRING should be ignored. In this way, when the processor finds the STRING for the third time, it places the cursor at the beginning of the STRING and updates the text on the screen according to the row and column referred to the STRING leaving the cursor at its beginning.
To run this command, you must set the following parameters:
- Definition of the STRING to search for
- If the specified COUNT looks for the STRING the number of times given by the COUNT
- STRING not specified, last search that was indicated earlier
- STOP cancels the command
6.4 Replace (R KEY)
This command swaps one STRING for another.
Example: If it had the following text:

To change the STRING “Mexico” to “Portugal” you must proceed as follows:
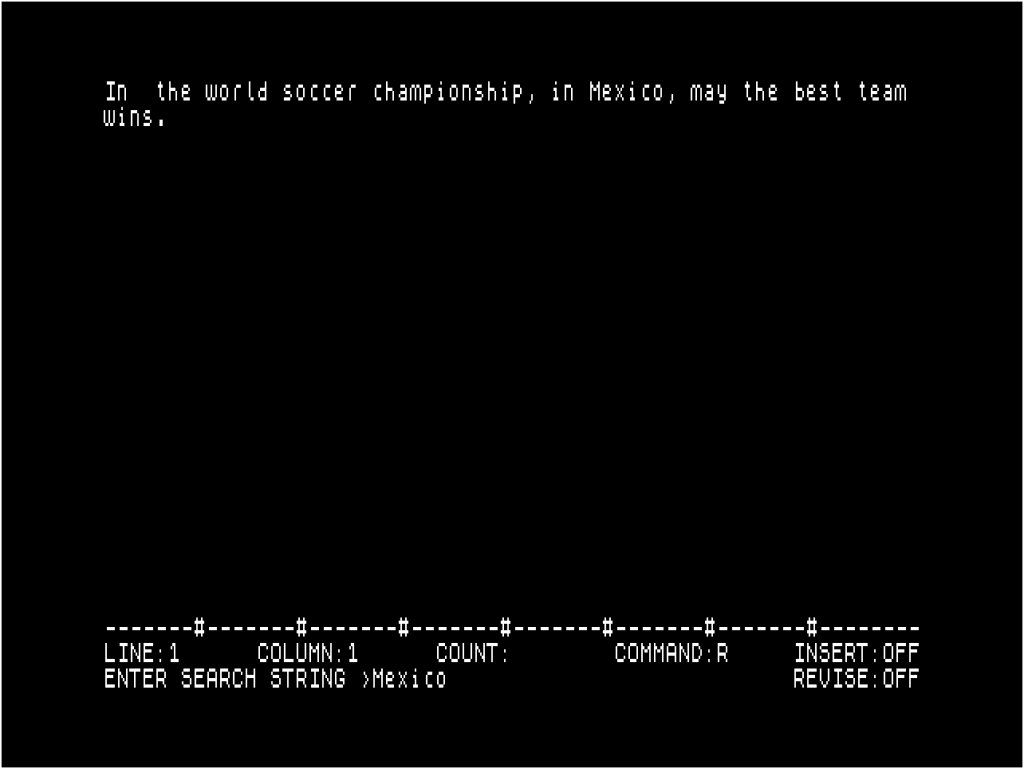
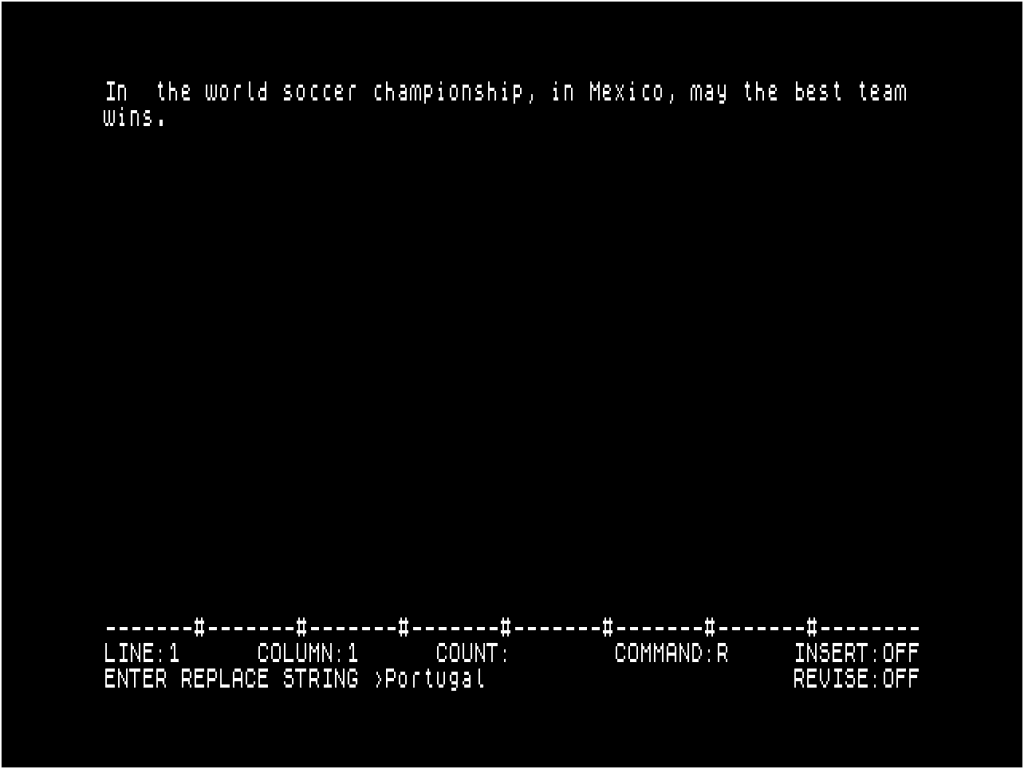
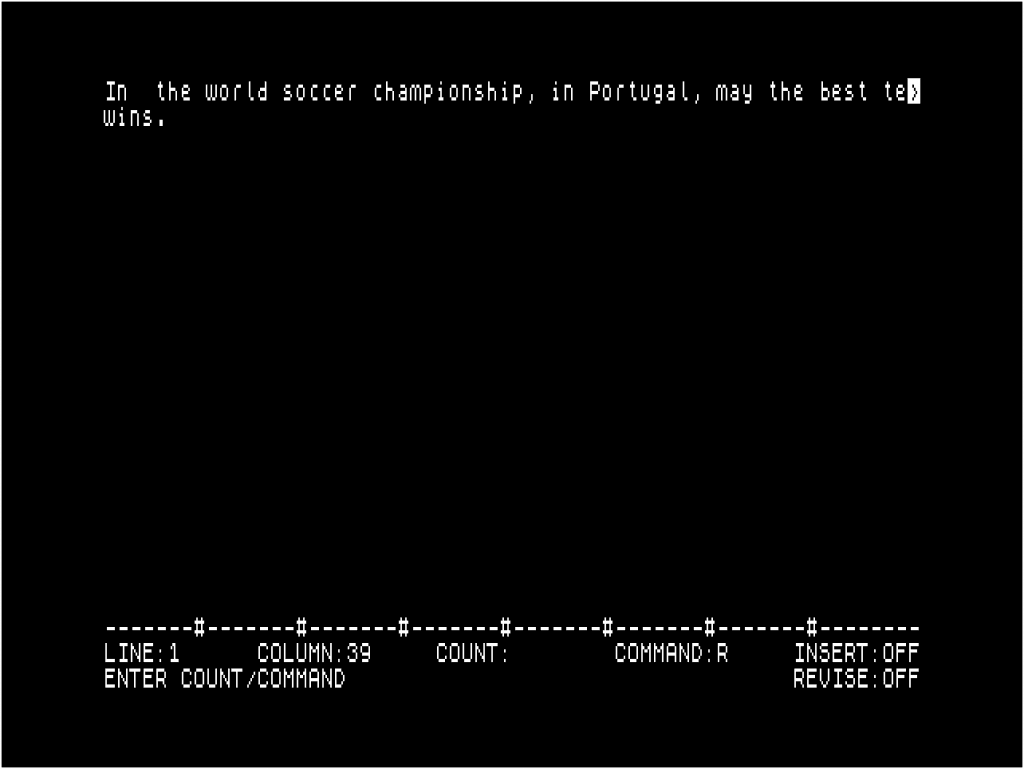
First press the R key, appearing on line 24 of the screen the first message with the intention that you should type the STRING to replace. The following message indicates that you should write the new STRING that will replace the first one. Each of the STRINGS must be followed by the ENTER key. After the entry of the second STRING, the text becomes the new shape:
Summarizing the REPLACE command should be executed in the following order in the parameter entry:
- Press the R key to start the command
- Type the STRING to replace and then press the ENTER key
- Type the new STRING and then press the ENTER key
- Failure to specify the first two parameters will be executed the command with the parameters of the previous REPLACE
- STOP cancels the command
6.5 Define TABS (T KEY)
Resets the TABS table.
To define new TABS you must first press the T key (TAB). At the beginning of line 24 of the screen appears the following message: DEFINE TABS >. This message indicates that you should type the number of columns where you want to place the TABS. TABS must be defined separated by commas and be less than 64.
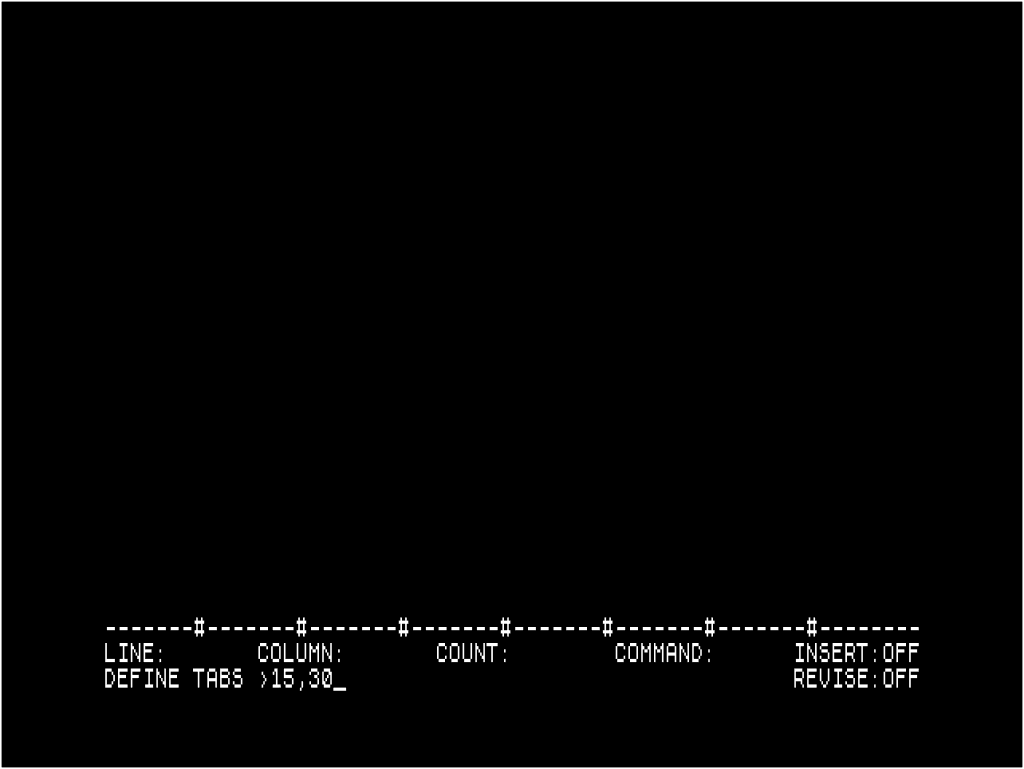
Example:
- Press the T key
- Write the numbers 15,30 and then the ENTER key
Line 22 is left with the characters representing the TABS in the following position:
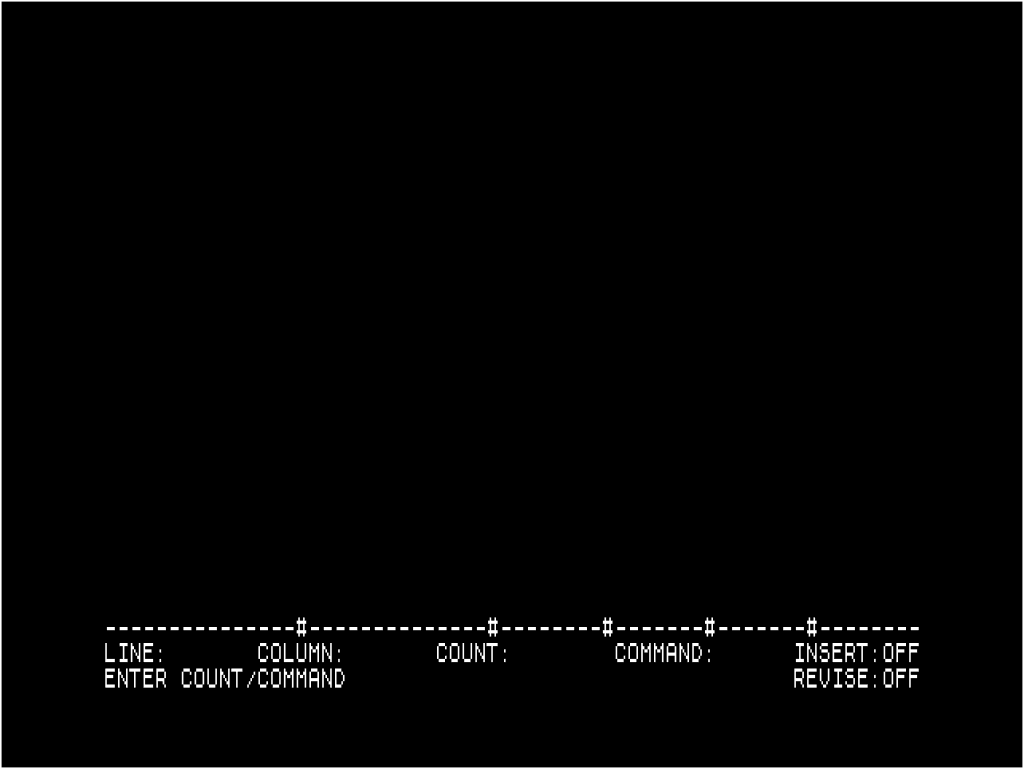
i.e., the first TAB is in column 15 and second in column 30. Note that in the space where previously were 4 TABS defined are now only 2.
6.6 Reform (B KEY)
Formats a paragraph of text. This formatting begins on the line corresponding to the position of the cursor and ends when the processor faces a period “.” indicating paragraph.
Example: If you had the following text:
To reform the paragraph, first place the cursor on the first line of text with the help of the keys that move the cursor. Then press the B key and the text is as follows:

6.7 Move block (M KEY)
Moves block of lines, indicating the number of the initial row, number of rows to move and line to which you will run the MOVE. To simplify the example that we will show below, the lines of text are represented with indication of the referring line:
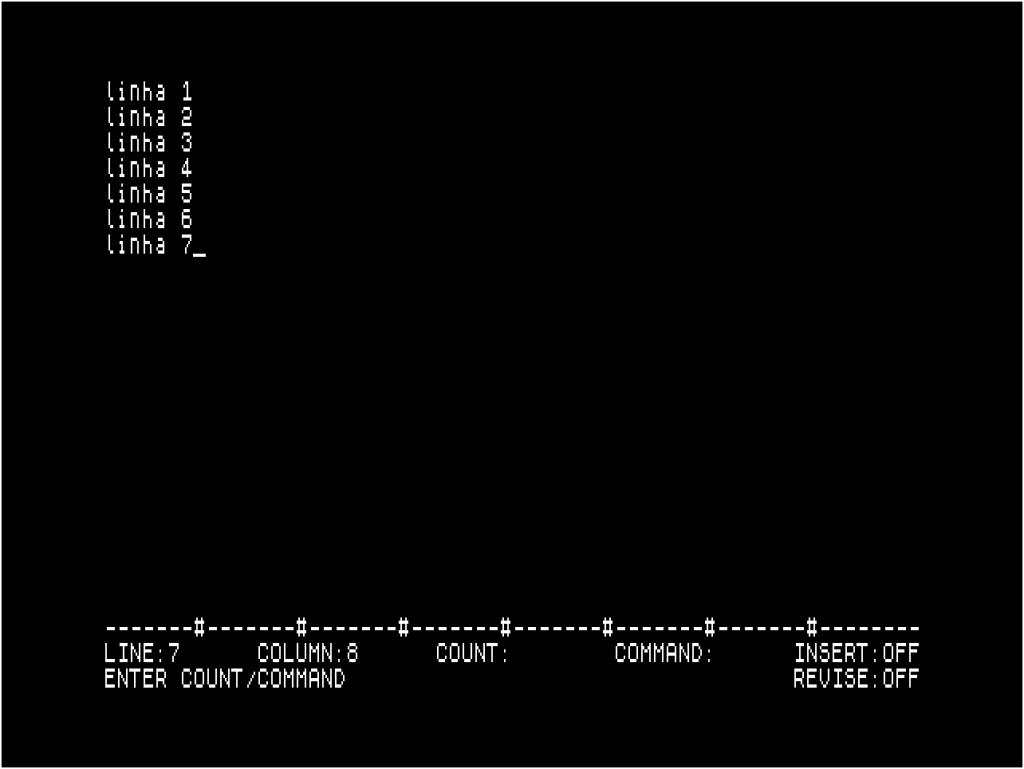
If you wanted to move lines 2 and 3 to line 6 you should do the following:
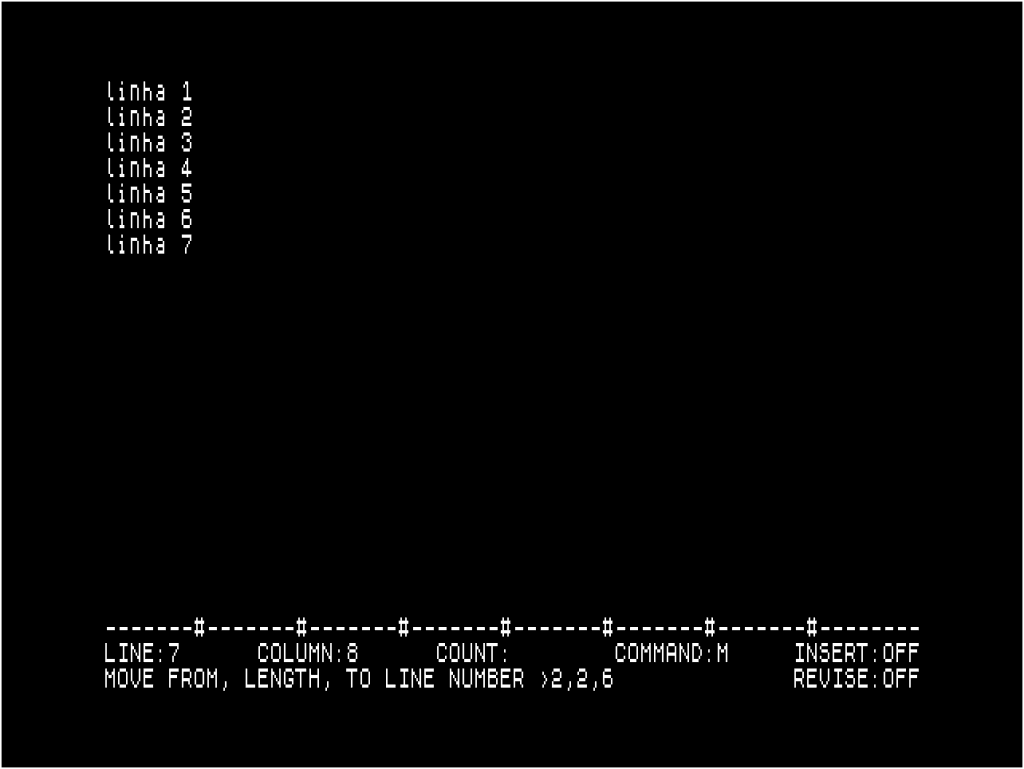
First press the M key starting the MOVE command. Then it indicates the number of the line from which it will run the MOVE: therefore line 2; the number of lines you want to move; 2 lines and finally the line to which it moves, in this case line 6.
These parameters must be separated by commas to distinguish each other. Line 24 of the screen would look like this:
To have the command executed just press the ENTER key appearing the text as follows:
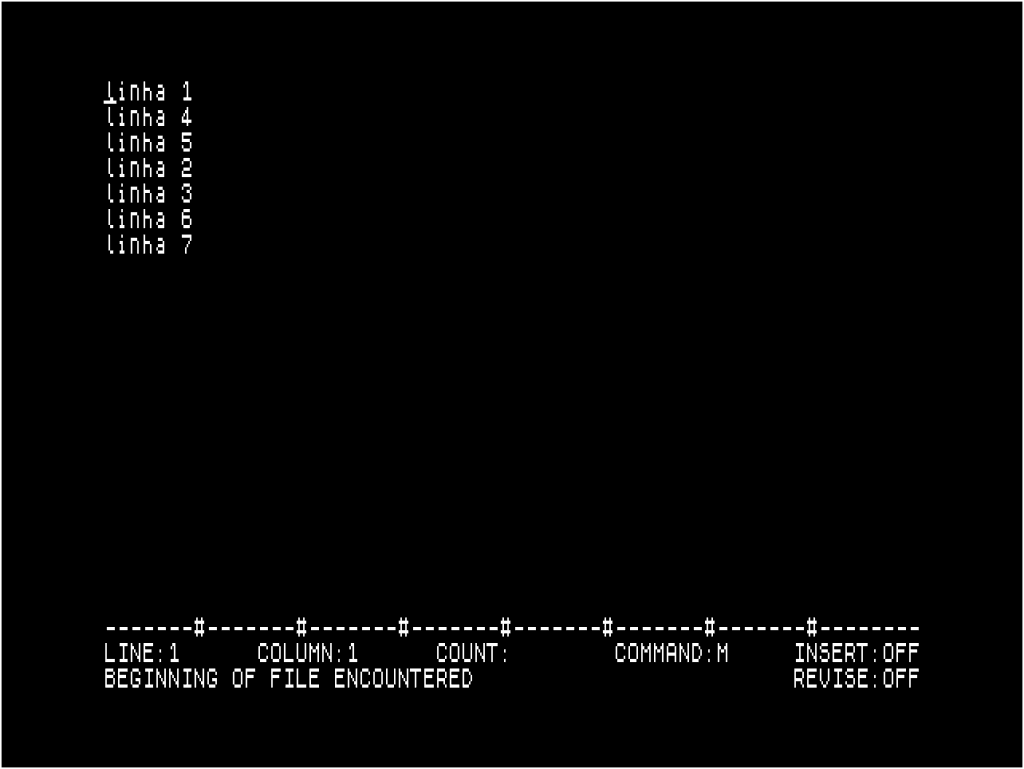
We can summarize that to execute the MOVE command it is necessary to set the following parameters:
- MOVE FROM – initial line from where you move text
- LENGHT – total number of rows to move
- MOVE TO – line to where you move text
- STOP cancels the command
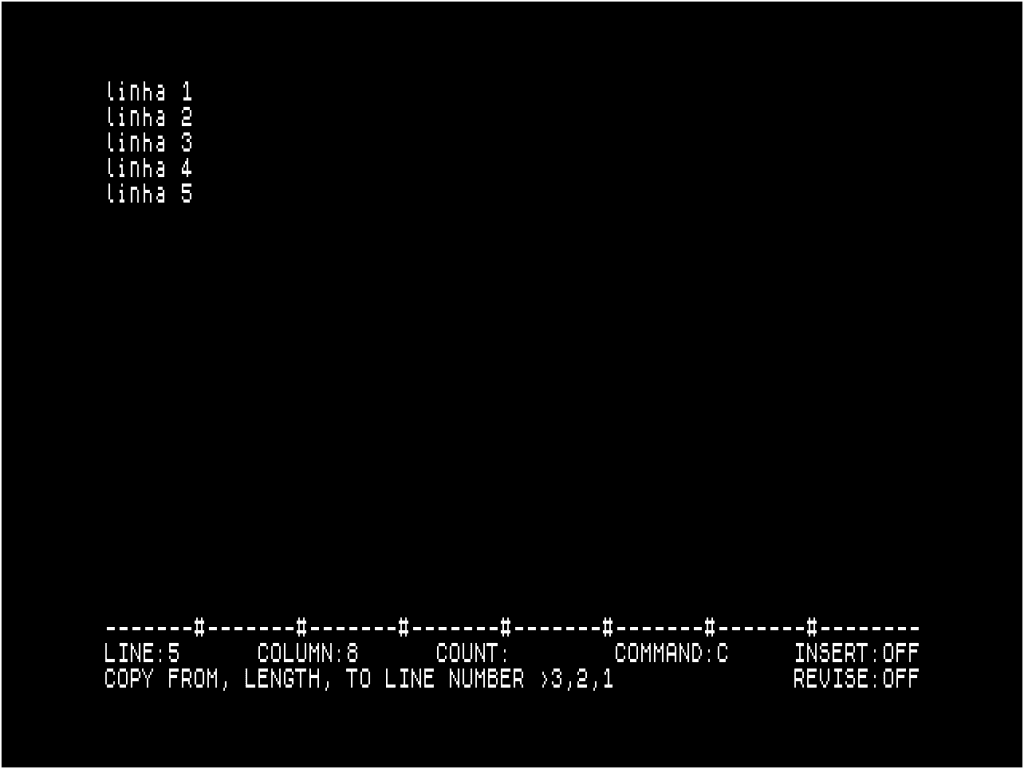
6.8 Copy block (C KEY)
This command copies a block of lines working in the same way as the previous command, but the lines from which the text is moved are not taken. This means that a full copy of the lines indicated for the line where the copy is deseka is made. In the same way as in the previous case let us give a simple example.
Let us say we had the following text:

If you want to copy lines 3 and 4 to line 1, then you must perform the following process:
First press the C key (COPY) to start the command. It then indicates the parameters the same way as in the last command. Line 24 of the screen would have the following content.
For the command to execute just press the ENTER key getting the text as follows:
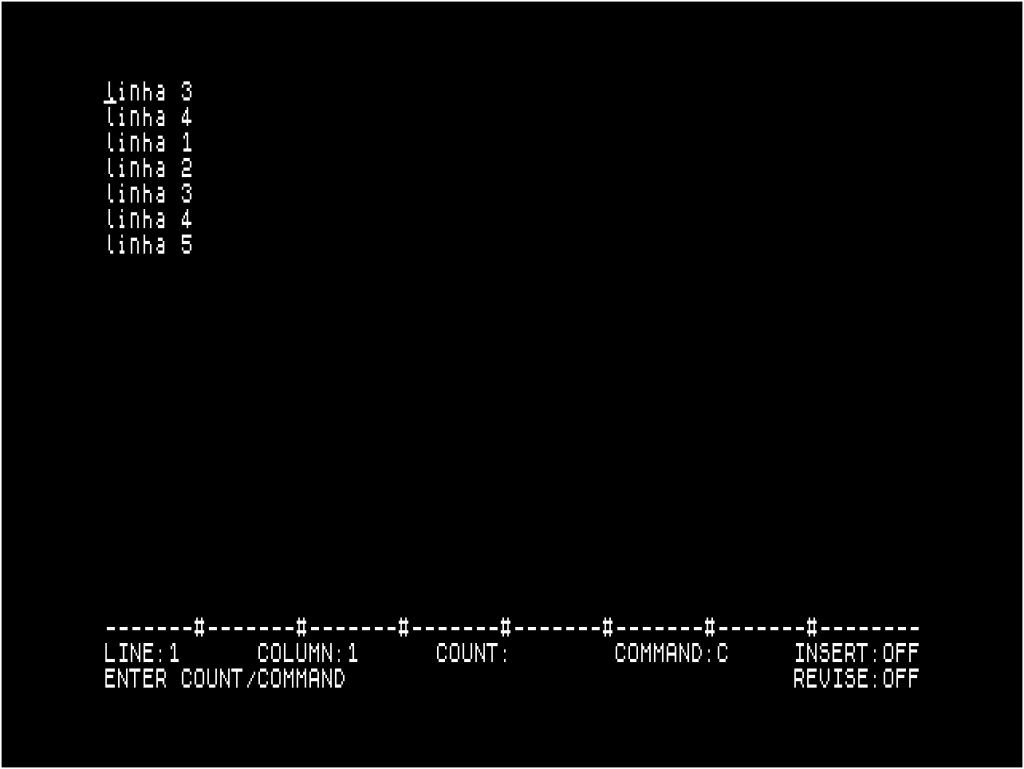
In this case, the final text has two more lines of text while in the previous command, the final number of lines is always the same. Summarizing the COPY command copies an image of text to the line that the user indicates.
We can summarize that to execute the COPY command it is necessary to set the following parameters in the indicated sequence:
- COPY FROM – initial line from where the text is copied
- LENGHT – total number of rows to copy
- COPY TO – line to which the text is copied
- STOP cancels the command
6.9 Exit (E KEY)
Exit command is basically a SAVE command with a RESET erasing the text from memory.
We will not refer again to this command’s description since it has been exemplified in chapter 2 of this manual. However, the necessary parameters are:
- D key saves the text on the disk
- T key saves the text on the cassette
- STOP cancels the command
6.10 Save (S KEY)
Saves the file in edition in cassette recorder or FLOPPY DISK DRIVE, but the processor remains in editing.
This command is the same as the previous one with the only difference being that the processor after having saved the text in the indicated recording unit returns to the previous state. You are of interest when you want to make several copies of a given text. To do this, simply edit with the text and then execute the command SAVE, as many times as the necessary copies indicating the name with the text will be saved.
Example:
Let us assume that it had the following text in edit and the processor was in INSERT:OFF mode:
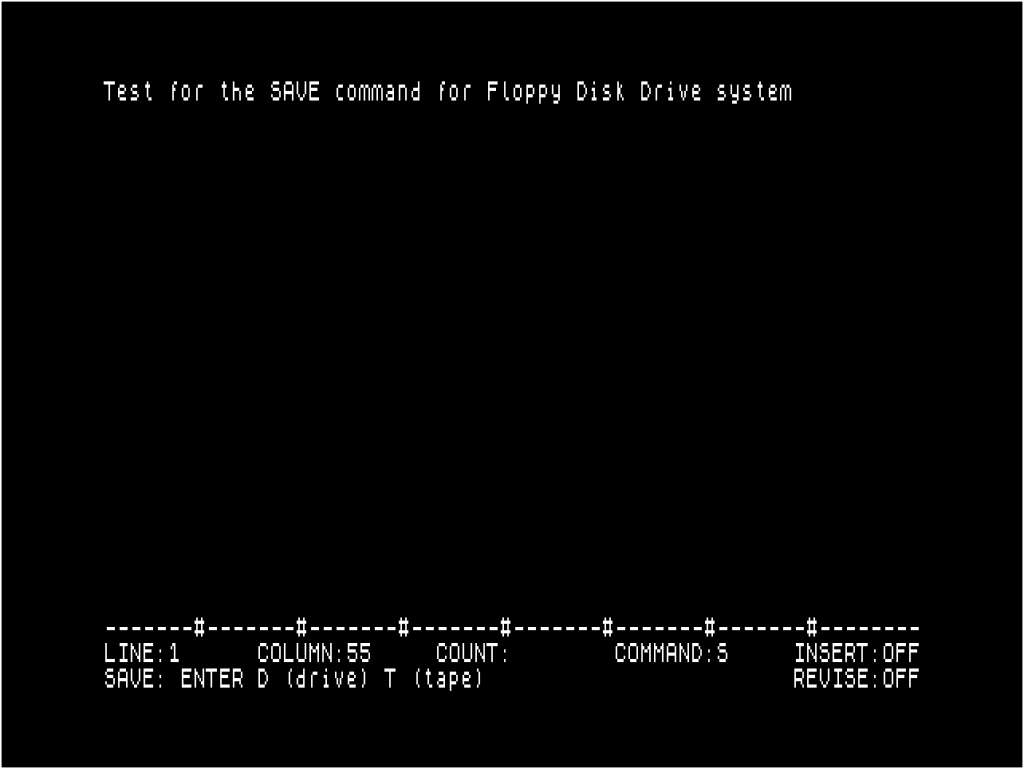
To run the SAVE command, press the S key by then type the name with which you want to save the text. At this point line 24 of the processor is left with the following contents:
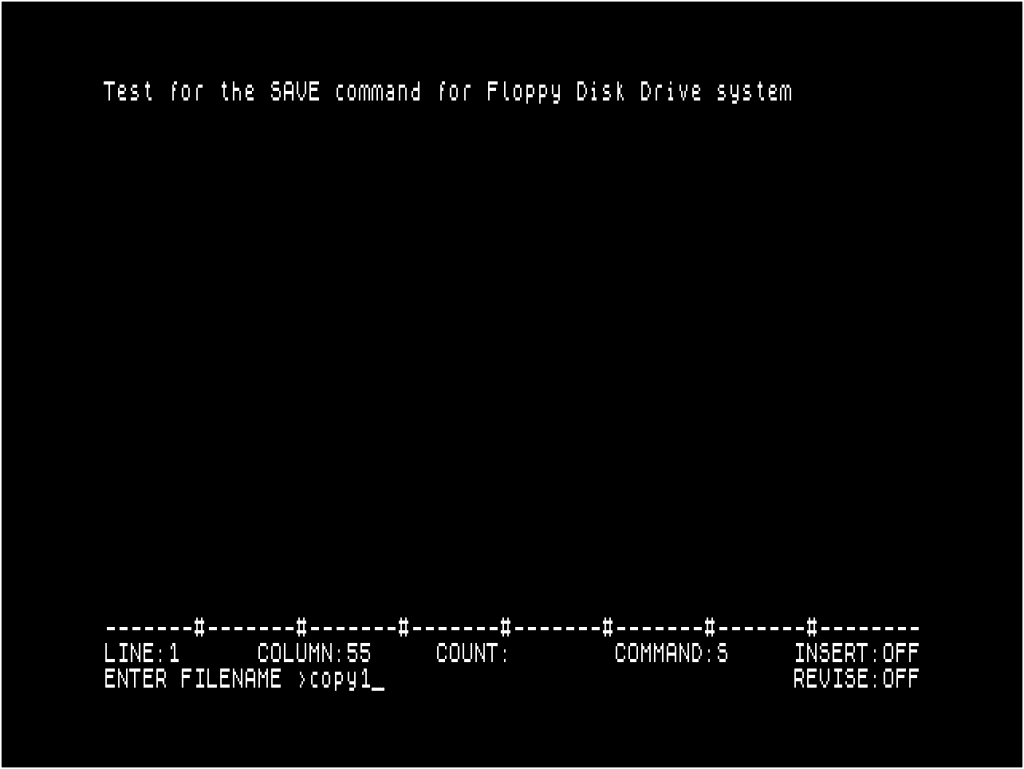
to save the text named COPIA1 on disk A.
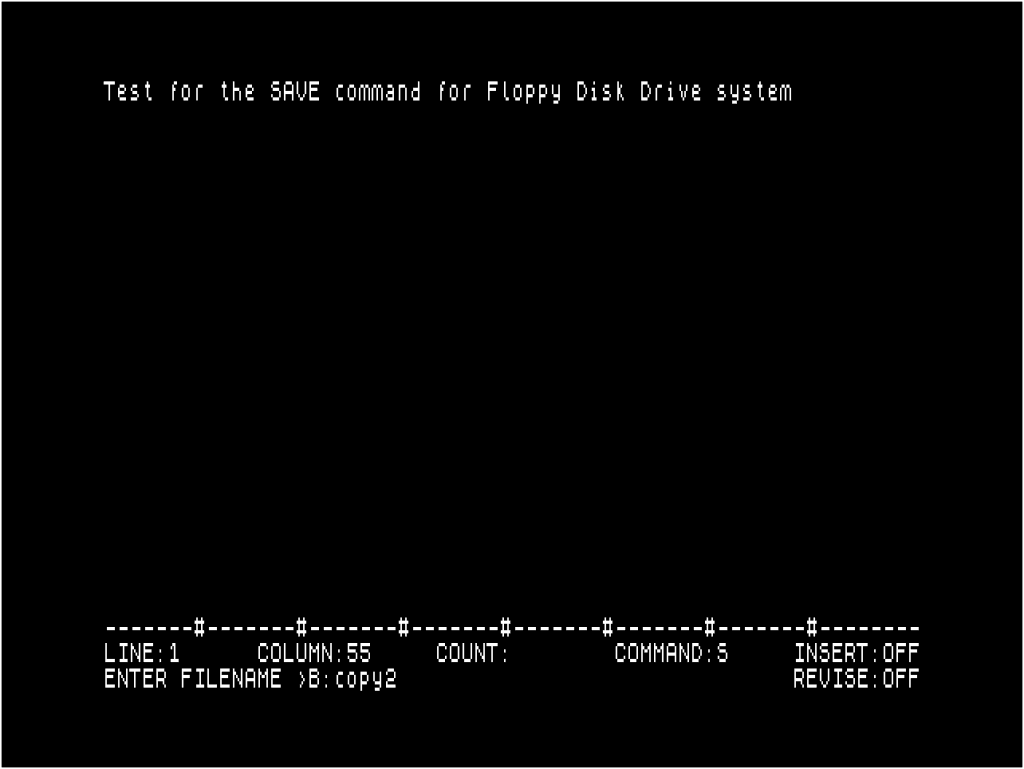
to save the text named COPIA2 to disk B.
Parameters:
- D key saves the text on the disk
- T key saves the text on the cassette
- STOP cancels the command
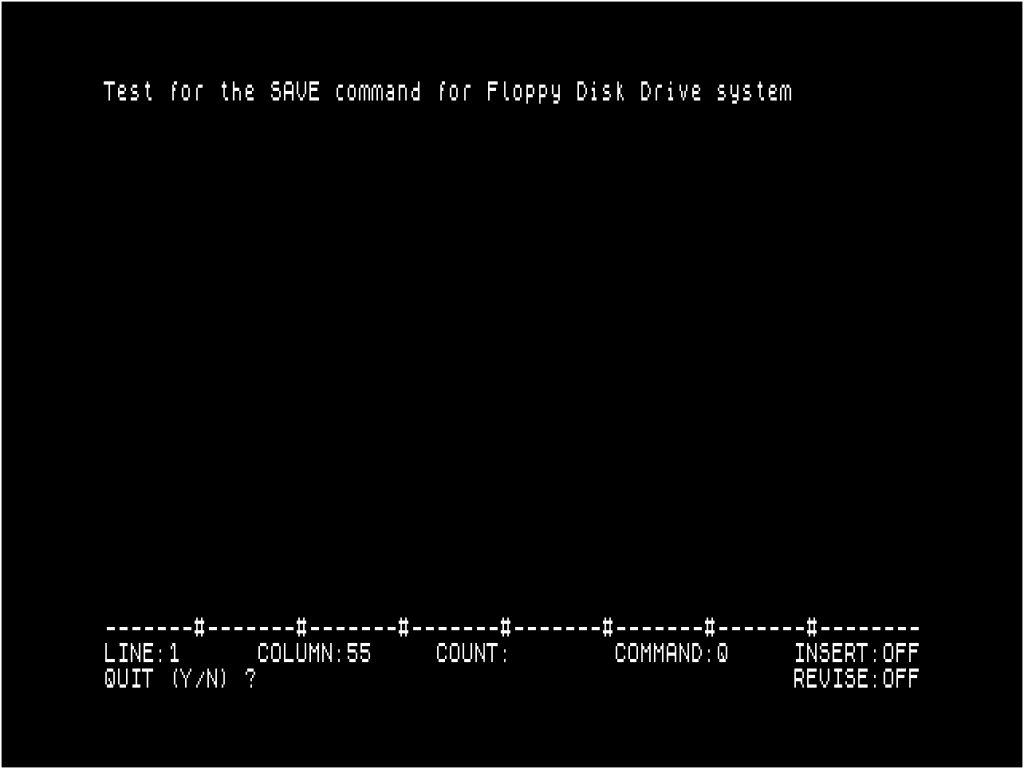
6.11 Quit (Q KEY)
Quit command resets the processor without saving the text in RAM.
When trying to execute the QUIT command the processor places a message on line 24 of the screen in order to allow the user to return again to the editing of the text and thus not lose the text. Note that if you reply to the message with the Y key, you lose the text being edited.
The parameters of this command are as follows:
- Y key executes the command
- N key the processor returns to the previous state.
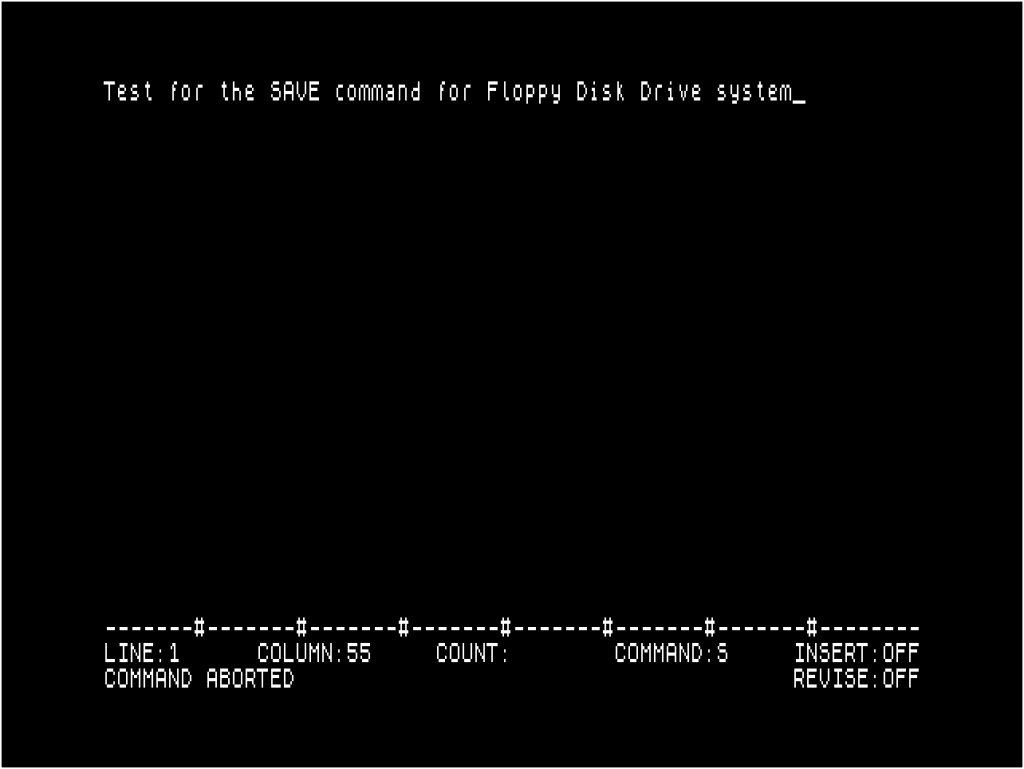
6.12 Abort (SYMBOL SHIFT + A KEYS)
Cancels the command being interpreted. This command is practically used in all other commands so that the user can abandon any command at any parameter entry point.
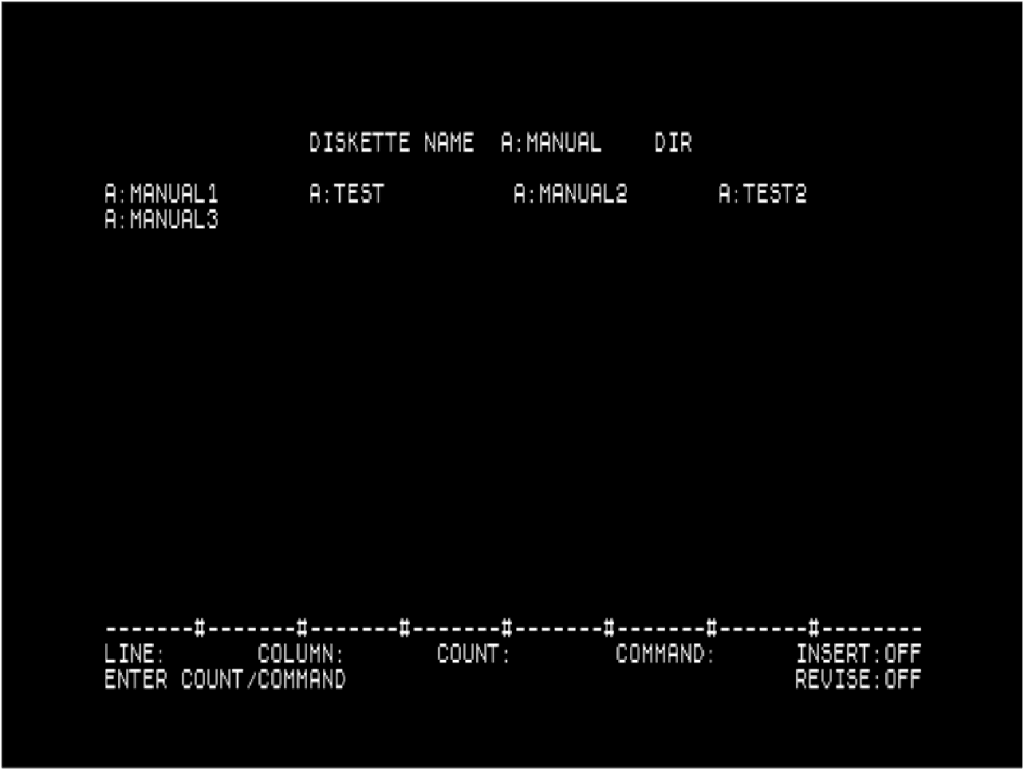
6.13 List (L KEY)
Shows the name of all files on the diskette of the specified disk (A, B, C, or D), as well as the name of the diskette. For example, if we wanted to see the names of the programs burner in the “diskette” inserted in disk A:
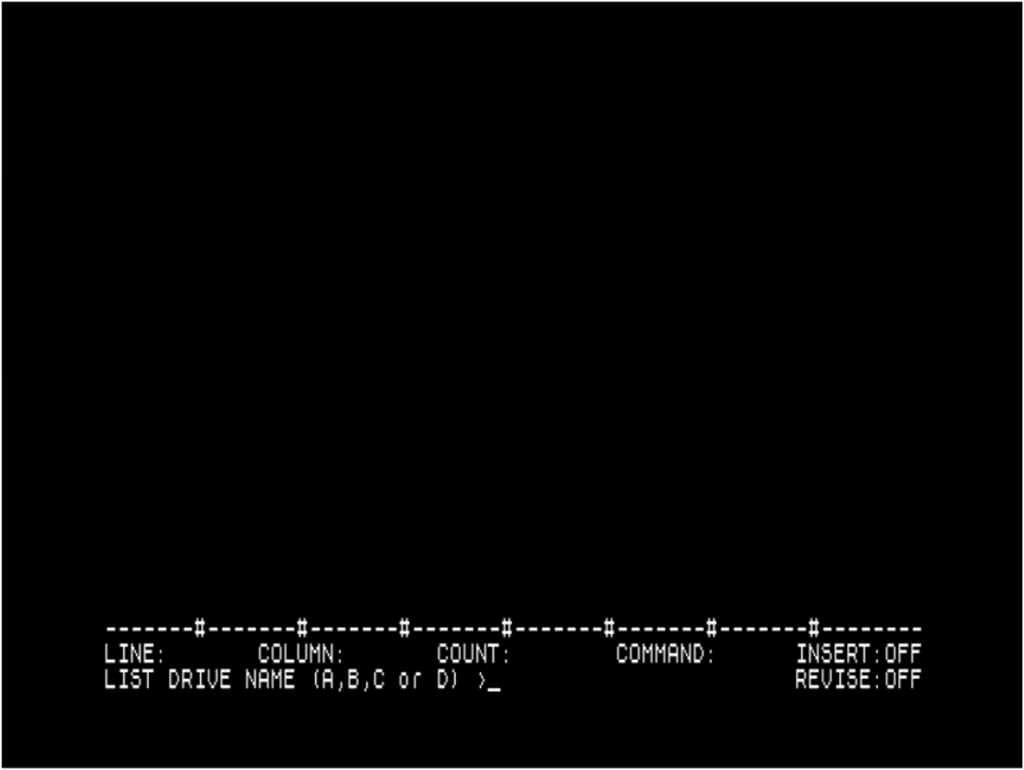
First press the L key (LIST) and then the A key. This means that the processor is reading the directories of the diskette. If the diskette is called MANUAL and had recorded the following programs: MANUAL1, MANUAL2, MANUAL3 the screen would look like this:
The parameters of this command are as follows:
- Disk name: KEY A, B, E, or D
- STOP cancels the command
6.14 Delete file (D KEY)
Deletes a file in the diskette from the disk drive (A, B, C, or D) with the name specified by the user.
Example:
If you had run the previous command and verified that the following files existed on the diskette of disk B.
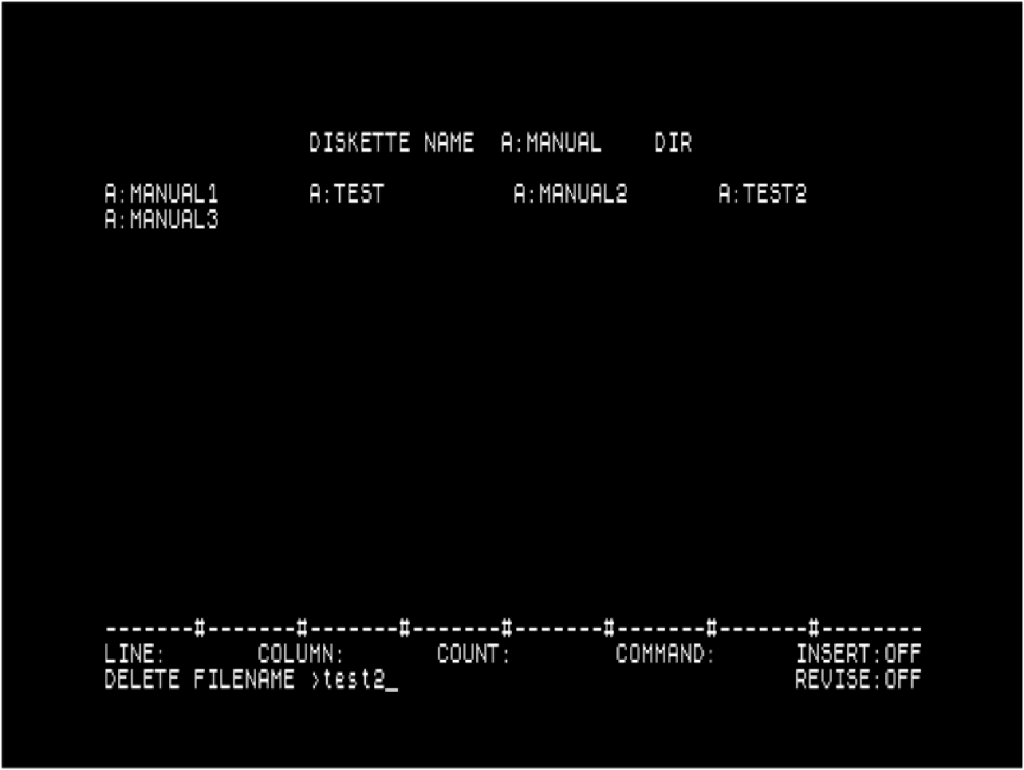
to delete the TEST2, must perform:
First press the D key (DELETE FILE) then type the name of the disk and text on line 24 of the screen as follows: ENTER FILENAME >B:test2 and finally press the ENTER key.
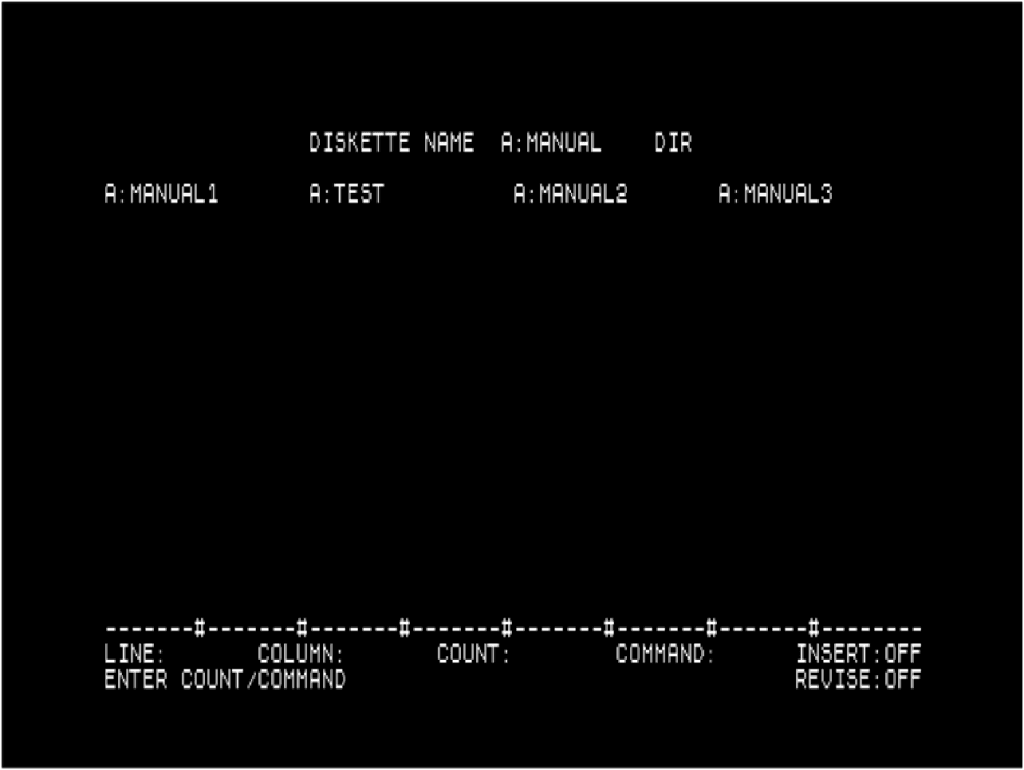
Redoing the LIST command, you can see that this file no longer appears on the screen, and consequently, has been deleted from the diskette.
Like the previous commands, this command has the following sequence:
- Press the D key to start the command
- Type the name of the file to be deleted followed by the ENTER key
- STOP cancels the command
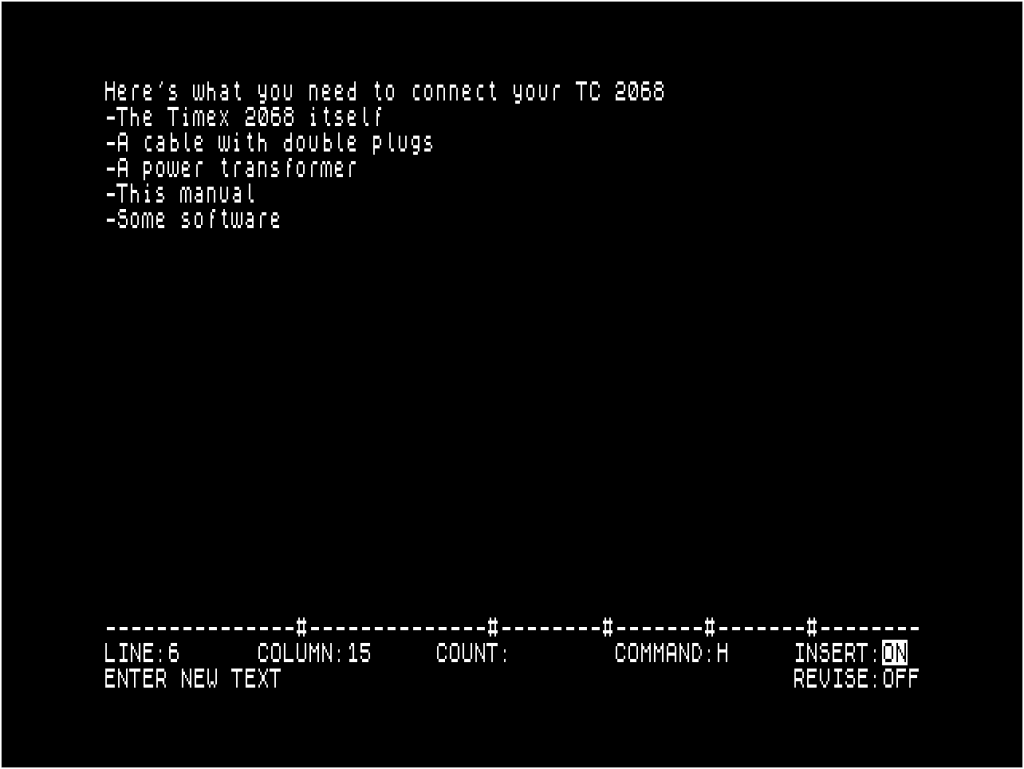
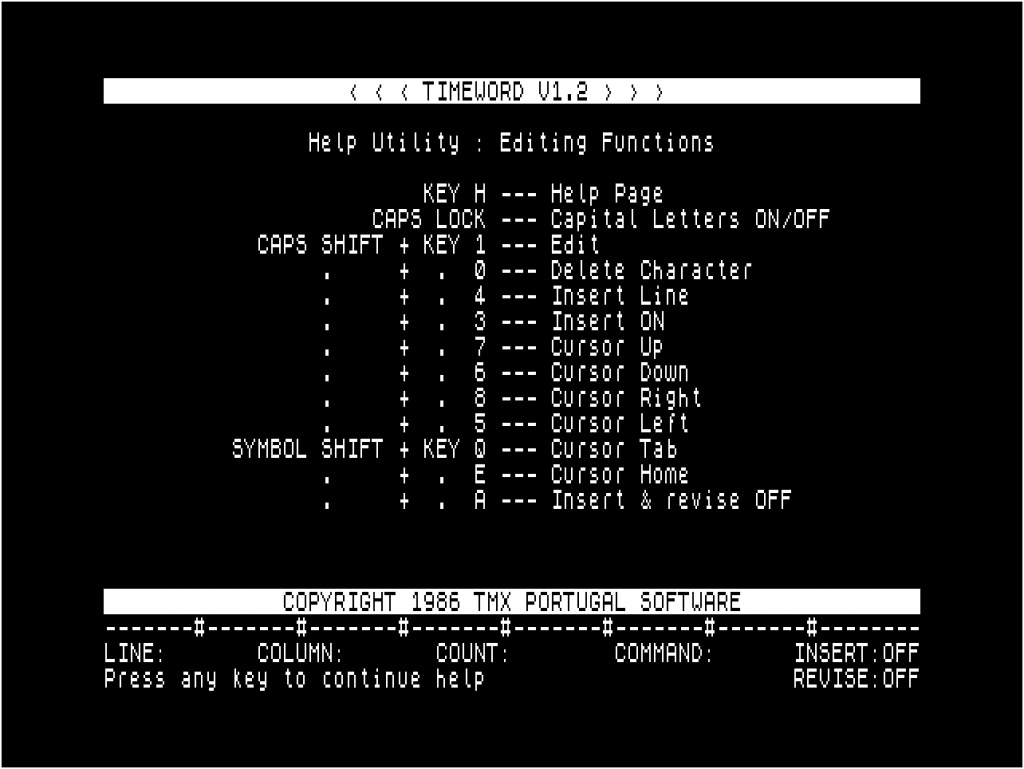
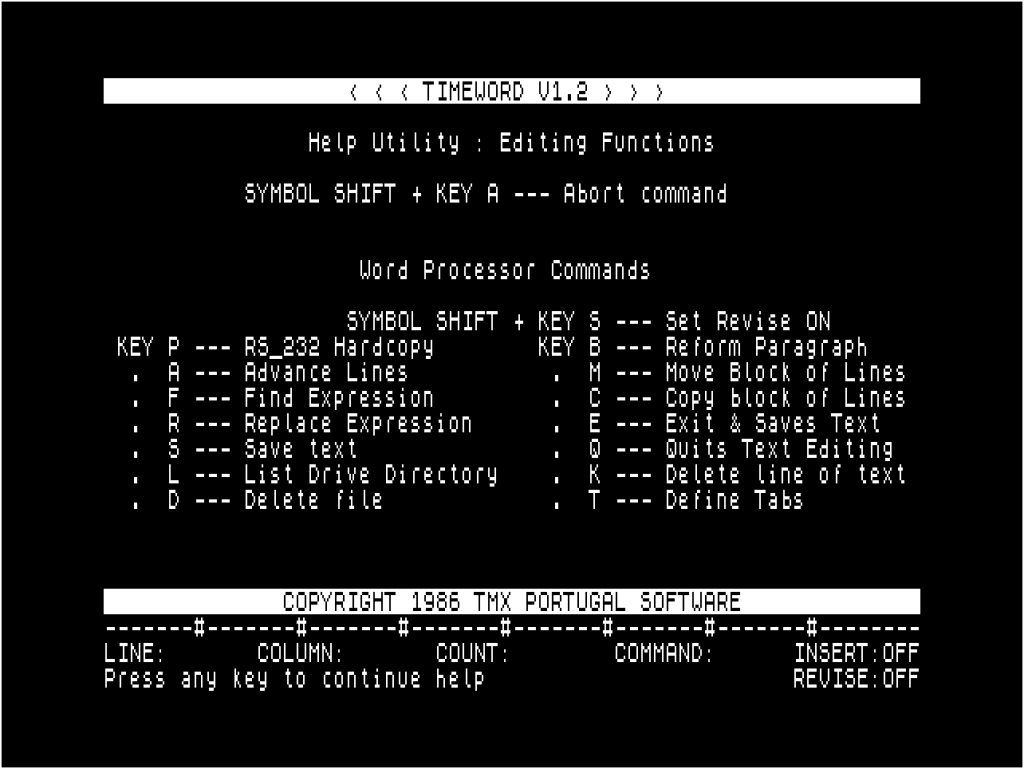
6.15 HELP (H KEY)
Put the “Help” utility on the screen. This utility lists all the editing functions and commands of the processor, the keys corresponding to the graphic characters and the keys that are defined for the “escape” sequences, which allow you to obtain the various types of characters on your TC 2080 printer.
The “Help” is formed in three pages in a row as follows.
PAGE 1
PAGE 2
PAGE 3